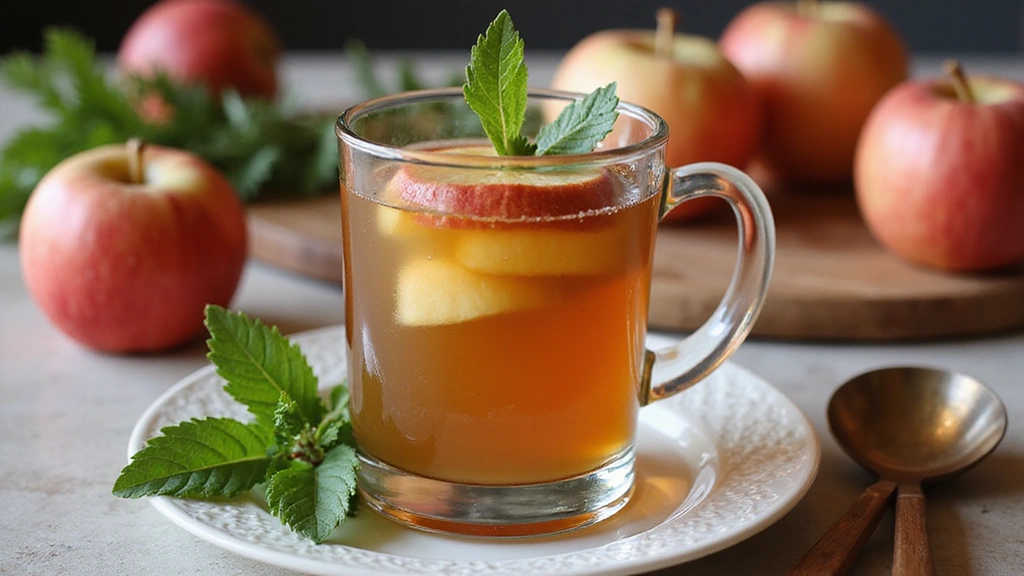
As the leaves turn and the air becomes crisp, nothing captures the essence of fall quite like homemade apple cider.
The rich blend of apples, spices, and warmth creates a cozy beverage perfect for chilly evenings.
I first encountered this delightful drink at a local fall festival, where the aroma of simmering cider filled the air.
With just a few simple ingredients and a bit of patience, you can recreate this seasonal favorite in your own kitchen.
Whether you’re hosting a gathering or simply enjoying a quiet night in, homemade apple cider is sure to bring comfort and joy.
Prepare to envelop your senses in the flavors of autumn with this timeless recipe.
The History and Cultural Significance
• Homemade Apple Cider traces its origins to ancient Europe, where it was originally created by farmers using surplus apples.
• The dish evolved over decades as fermentation techniques improved, eventually becoming the beloved non-alcoholic version we know today.
• In North America, apple cider traditionally appears at fall festivals and Thanksgiving celebrations, symbolizing abundance and harvest.
• While many variations exist across different regions, the authentic version maintains a balance of sweetness and spice that sets it apart from imitations.
Recipe Overview
Nutritional Information (per serving)
Essential Equipment Guide
Large Stockpot: A large stockpot is essential for holding all the ingredients and allowing them to simmer together. An alternative could be a slow cooker, but ensure it has enough capacity.
Strainer or Cheesecloth: This is crucial for removing solids and achieving a clear cider. A fine-mesh strainer or several layers of cheesecloth are ideal.
Wooden Spoon: Use a wooden spoon to stir the cider as it simmers. It won’t react with the acidic ingredients and helps distribute heat evenly.
Ingredients
For the Cider Base
|
|
| Amount | Ingredient | Notes |
|---|---|---|
| 10 medium | apples | quartered, a mix of sweet and tart varieties |
| 1 cup | brown sugar | adds sweetness and depth |
Spices
| Amount | Ingredient | Notes |
|---|---|---|
| 3 sticks | cinnamon | for warmth and spice |
| 1 tablespoon | whole cloves | infuses aromatic depth |
| 1 tablespoon | allspice berries | enhances flavor complexity |
| 1 whole | nutmeg | grated, for additional spice |
Preparation Methods
Maceration: Allowing the apples to macerate in sugar and spices before cooking releases their juices and intensifies flavor. To master this, ensure even coating of sugar on the apple pieces.
Simmering: Slow simmering allows flavors to meld without boiling away the delicate aromas. Keep the heat low and cover the pot to retain moisture.
Straining: Straining through cheesecloth or a fine mesh ensures a smooth, clear cider. Press gently on the solids to extract every drop of infused liquid.
Step 1: Prepare Ingredients

Wash and quarter the apples, leaving the skin and core intact.
Combine the apples, brown sugar, and spices in a large stockpot.
Stir until the apples are evenly coated with sugar and spices.
Ensure the pot is large enough to accommodate all the ingredients comfortably.
Step 2: Macerate the Apples

Let the apple mixture sit for 30 minutes to macerate.
This process will draw out the natural juices and flavors.
Check that the sugar is dissolving and the apples are releasing liquid.
This step enhances the overall flavor profile of the cider.
Step 3: Add Water and Simmer

Add enough water to cover the apples in the pot.
Bring the mixture to a boil over medium-high heat.
Once boiling, reduce the heat to a simmer and cover the pot.
Maintain a gentle simmer for 2 hours, stirring occasionally.
Step 4: Mash the Apples

Remove the pot from heat after simmering.
Use a wooden spoon or potato masher to gently mash the apples.
This releases additional flavors and juices into the cider.
Be careful to avoid splashing hot liquid.
Step 5: Simmer Again

Return the pot to the stovetop and simmer for another hour.
This allows the mashed apples to continue releasing flavors.
Monitor the liquid level, adding water if necessary to prevent drying out.
Stir occasionally to ensure even cooking.
Step 6: Strain the Cider

Place a fine-mesh strainer or cheesecloth over a large bowl.
Gently pour the cider mixture through to remove solids.
Press down on the solids to extract all liquid.
This step ensures a smooth and clear final product.
Step 7: Sweeten to Taste

Taste the strained cider and adjust sweetness if needed.
Add more sugar or honey if desired, stirring until dissolved.
Taste again to ensure flavors are balanced.
This step allows customization to personal preference.
Step 8: Reheat and Serve

Transfer the cider back to the pot and reheat gently.
Serve the cider warm in mugs, garnished with a cinnamon stick.
Ensure the cider is hot but not boiling when serving.
Enjoy your homemade apple cider on a cozy evening.
Critical Timing and Temperature Guide
Simmering: Maintain a low simmer at around 180°F (82°C). Avoid boiling to prevent losing delicate flavors.
Maceration: Allow at least 30 minutes for maceration. The apples should appear slightly softened with liquid pooling.
Reheating: Reheat to just below boiling, around 160°F (71°C). Avoid boiling to maintain clarity and aroma.
Pro Tips for Homemade Apple Cider
• Ingredient Selection: Choose a combination of sweet and tart apples like Honeycrisp and Granny Smith for balanced flavor.
• Preparation Secret: Macerate apples in sugar and spices before cooking for deeper flavor extraction.
• Temperature Management: Keep the heat low to preserve the cider's aroma and prevent bitterness.
• Texture Enhancement: Strain thoroughly to achieve a smooth, clear cider without pulp.
• Flavor Layering: Use whole spices during cooking for a more nuanced flavor profile.
• Make-Ahead Strategies: Prepare cider a day in advance to allow flavors to meld, storing in the refrigerator.
• Restaurant-Quality Finishing Touches: Garnish with fresh cinnamon sticks or apple slices for an elegant touch.
• Equipment Optimization: Use a stockpot with a heavy bottom for even heat distribution and better results.
Troubleshooting Common Issues
• Cloudy Cider: This can be caused by insufficient straining. Use a finer mesh or double-layer cheesecloth for clarity.
• Too Sweet: If over-sweetened, add a splash of lemon juice to balance flavors.
• Weak Flavor: Ensure apples are fully macerated and simmer for the recommended time to extract maximum flavor.
• Spices Overpowering: Use whole spices rather than ground to control intensity, and remove them early if needed.
• Burnt taste: This is usually due to high heat. Maintain a gentle simmer and stir occasionally to prevent sticking.
• Separation during storage: Shake or stir well before reheating to reincorporate any settled solids.
Variations and Regional Differences
• French Cidre: Typically fermented, producing an alcoholic version. Often less sweet and more tart.
• British Mulled Cider: Features additional spices like star anise and citrus peels, served warm.
• American Hard Cider: Fermented for alcoholic content, often carbonated and available in various flavors.
• German Apfelwein: Similar to hard cider, it is dry and often enjoyed with sparkling water.
Food Science Behind the Recipe
• Maillard Reaction: Occurs during maceration as sugar interacts with apple enzymes, enhancing color and flavor.
• Diffusion: The process through which flavors from spices permeate the apple cider during simmering.
• Caramelization: Sugar caramelizes slightly during simmering, contributing to the cider's depth and complexity.
Frequently Asked Questions
What's the most common mistake people make when preparing homemade apple cider? Overboiling the cider, which can lead to a loss of flavor and a cloudy appearance.
Can I use store-bought apple juice? Yes, but starting from whole apples provides a fresher, more complex flavor.
How do I make the cider less sweet? Use less sugar or add a splash of lemon juice to cut the sweetness.
Can homemade cider be stored? Yes, store in an airtight container in the refrigerator for up to a week.
Is it possible to make a spiked version? Absolutely, add a splash of rum or bourbon to each mug before serving.
What is the best type of apple to use? A mix of sweet and tart apples like Honeycrisp and Granny Smith provides the best balance.
Can I reuse the spices? It's not recommended as they lose potency after the initial cooking.
Serving and Presentation Guide
• Traditional Presentation: Serve warm in a rustic mug with a cinnamon stick garnish.
• Festive Presentation: Float thin apple slices and star anise in the mug for a decorative touch.
• Chilled Option: Serve over ice in a tall glass with a lemon wedge for a refreshing twist.
• Buffet Style: Keep warm in a slow cooker with a ladle for self-service at gatherings.
Conclusion
Homemade apple cider is a delightful way to embrace the flavors of fall and create lasting memories.
With a few simple ingredients and a bit of patience, you can craft a beverage that warms the soul and delights the senses.
Whether sipped by a roaring fire or shared among friends, this cider is a quintessential autumn treat.
I encourage you to try this recipe and experience the cozy comfort of homemade apple cider.






Leave a Reply