
Fall is here and the air feels crisper. The season makes dust and grime show up in new corners. I made this post because fall cleaning can reset a home without stealing your weekend. I wanted to give you a simple plan that actually works. You get a fresh start, a calmer space, and less mess as the days get busy.
If you juggle work, kids, and caretaking, or you simply want your place to feel cozy, this one is for you. This is for homeowners and renters who want results fast with tools you already have. If you care about a home that breathes easier, you’ll find ideas you can use today.
Here you will find 18 deep cleaning hacks for fall that make big chores feel small. They cover the kitchen, baths, floors, and those hidden spots that collect dust. Each idea is practical, easy to try, and fits a real life schedule. You will learn quick routines, simple substitutions, and clear notes you can follow today.
One quick move is to start in the kitchen with a fast reset: wipe the stove hood, clean the sink, and pull out the fridge shelves for a quick wash. Dust ceiling corners and light fixtures with a microfiber cloth. Run a damp rubber glove over furniture to lift hair and pet fluff. Finish with a quick mop on the entry and other busy paths. These small tweaks take minutes and add up to a real difference.
These hacks do more than make rooms look clean. They reduce dust that can irritate you and your family. They save you money by letting you handle it with simple supplies. They also give you confidence to keep things tidy as the seasons change and guests start to visit.
Here is why this approach works: small, steady steps beat one long sprint. Take a few minutes tonight to pick one or two hacks to try this week. Next steps are simple: grab a cloth, set a 15 minute timer, and start. If you want, save this post for fast reference and share it with someone who could use a lighter fall cleaning routine.
Contents
- 1. Use Vinegar for Flawless Windows
- 2. Deep Clean Your Appliances with Baking Soda
- 3. Refresh Carpets with DIY Powder
- 4. Sanitize Your Mattress
- 5. Declutter Before You Clean
- 6. Clean Out Your Closets
- 7. Dust from Top to Bottom
- 8. Shine Up Your Fixtures
- 9. Tackle Your Bathroom Grime
- 10. Revive Your Outdoor Spaces
- 11. Organize Your Cleaning Supplies
- 12. Refresh Your Air Quality
- 13. Use Lemon for Natural Cleaning
- 14. Reorganize the Pantry
- 15. Clean Your Walls and Baseboards
- 16. Schedule Regular Maintenance
- 17. Utilize Multi-Use Cleaners
- 18. Embrace Minimalism
1. Use Vinegar for Flawless Windows

Streak-free windows make any room feel brighter. You want a clean look without harsh cleaners. Vinegar is a safe, cheap choice that cuts grime and dries clear. It lets fall light shine through.
Here is a simple routine you can keep week after week.
– What you need: Spray bottle, equal parts water and white vinegar, a microfiber cloth or crumpled newspaper.
– How to do it: Mix the solution in the bottle. Spray onto the glass. Wipe with your cloth or paper. For large panes, finish with a squeegee for a smooth, even edge. Don’t forget the tracks and screens.
– Why it works: Vinegar breaks up grease and mineral film on glass. It dries quickly and leaves little streaking when you wipe while the surface is still damp.
– Tips for best results: Clean on a cloudy day so sun doesn’t dry the liquid too fast. Start with the frame, tracks, and screens to remove dust before you touch the glass. If you have hard water, wipe with a dry cloth after spraying.
Small habits, big shine. With this cleaner, you may notice your windows stay clearer longer and your view of the season looks crisper.
Let the sunshine in! A simple vinegar solution can make your windows sparkle, bringing fall’s beautiful light into your home without harsh chemicals. Who knew deep cleaning could be so easy and eco-friendly?
1. Use Vinegar for Flawless Windows
Editor’s Choice

JohnBee Empty Spray Bottles (16oz/2Pack) – Adjustable Spray Bottles for …


USANOOKS Microfiber Cleaning Cloth Grey – 12 Pcs (12.5″x12.5″) – High Pe…

Scotch-Brite, All-Purpose 10 Inch Dual Blade Streak-Free Squeegee, Safe …
2. Deep Clean Your Appliances with Baking Soda

Deep clean your appliances with baking soda
You want clean appliances without harsh cleaners. Baking soda works well on fridge, oven, and microwave. It is gentle and it tackles grime. Here is a simple way to use it.
– Fridge deep clean: Mix baking soda with water to form a paste. Apply the paste to stubborn stains on shelves and walls. Let it sit for about 10 minutes. Scrub softly with an old toothbrush. Wipe clean with a damp cloth and dry.
– Oven upkeep: Rub a paste of baking soda and water on baked-on grime. Let it rest for 15 minutes. Scrub with a sponge. Then wipe away residue with a clean cloth.
– Microwave refresh: Fill a microwave safe bowl with water and 2 to 3 tablespoons baking soda. Heat until steam loosens stuck bits. Carefully remove the bowl and wipe the interior with a sponge. The odor will fade as you wipe.
– Hidden spots: Clean the toaster interior with a damp cloth. Avoid soaking the electronics. Slide out the crumb tray and wipe under the fridge with a dry cloth. Use a small brush for crumbs.
– Odor control in the disposal: Sprinkle baking soda in the garbage disposal. Run cold water while you switch it on. The smell goes away fast.
Here is why this works: baking soda is mild yet abrasive and it neutralizes odors. Next steps: keep a small jar in the cabinet and use it regularly for touchups.
Pro tips
– Regularly check expiry items in the fridge.
– Use an old toothbrush for hard-to-reach spots.
– Sprinkle baking soda in the disposal to kill odors.
2. Deep Clean Your Appliances with Baking Soda
Editor’s Choice

365 by Whole Foods Market, Baking Soda, 16 Ounce


HOMEXCEL Microfiber Cleaning Cloth,12 Pack Cleaning Rags, Cleaning Towel…
3. Refresh Carpets with DIY Powder

Refresh Carpets with DIY Powder
Carpets trap dirt and smells from kids and pets. You want a quick fix that feels clean.
Mix one cup baking soda with 10 to 15 drops of your favorite essential oil in a small bowl. Stir well. Oils like lavender or citrus smell nice, but pick what you like. If you have pets, choose pet-safe oils and test on a hidden spot first to avoid color changes.
Here is why this works: baking soda traps odors, while the oil leaves a gentle scent. Sprinkle a light layer over the carpet. Gently work it in with your hand or a broom. Let it sit at least 15 minutes. For strong odors, you can leave it overnight.
Then vacuum thoroughly. The carpet feels lighter and smells fresh. Do this before guests or after busy days to boost freshness.
– Choose oils that smell clean, like lavender or citrus, and keep them pet-safe.
– Test a small, hidden area first.
– Use this as a quick refresh between deeper cleanings.
It’s simple, fast, and frugal.
3. Refresh Carpets with DIY Powder
Editor’s Choice


Majestic Pure Lavender Essential Oil with Glass Dropper – Huge 4 Fl Oz -…
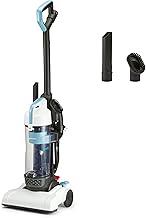
Amazon Basics Upright Bagless Vacuum Cleaner for Carpet and Hard Floors,…
4. Sanitize Your Mattress

How to sanitize your mattress
Your bed hides dust mites and musty smells. You sleep there every night. Clean it now and you will breathe easier. Here is why this works.
– Strip the bed and set aside sheets, pillowcases, and covers.
– Vacuum the mattress with an upholstery attachment, moving slowly and covering the seams.
– Sprinkle baking soda over the surface and let it sit for 15 minutes to neutralize odors.
– Vacuum again to lift the powder and dust from the surface and edges.
– Optional: mix a few drops of your favorite essential oil with the baking soda before sprinkling for a gentle scent.
– Wash bedding in hot water and dry fully to kill germs.
– Rotate the mattress every few months to keep wear even and prevent sag.
– Use a hypoallergenic mattress cover to cut dust mites and guard against spills.
– If possible, place the mattress outside in dry weather for a short time, or air it out by opening windows to let fresh air replace musty air.
Regular cleaning helps cut allergy flare ups and keeps your bed fresh. Set a monthly reminder to keep this routine. If you have pets or allergies, vacuum more often and choose washes on hot.
Next steps: stick with this plan and notice better sleep.
Don’t let dust mites steal your sweet dreams! A quick mattress sanitize can transform your sleep space into a fresh haven. Breathe easier and wake up revitalized!
4. Sanitize Your Mattress
Editor’s Choice

PlushDeluxe Premium Bamboo Mattress Protector – Queen Size, Waterproof, …

Broan-NuTone CT106G Upholstery Central Vacuum Hose Attachment, 6″ x 3.96…

HUMBLE BRANDS Original Formula Aluminum-free Deodorant. Long Lasting Odo…
5. Declutter Before You Clean

If your deep cleaning feels heavy, start with clutter. A neat space makes every scrub feel easier. Small wins add up fast. Here is why it works: less junk means you can reach corners, wipe shelves, and see the floor.
– Set a timer for each room, 15 to 30 minutes is enough for a quick pass.
– Sort with three boxes: keep, donate, toss. Label them as you go.
– Try the one-in, one-out rule: for every new item you bring home, let go of one old item.
– Involve the family. Play music, split tasks, and cheer as you move along.
– Start with the room that feels the messiest; it gives fast wins.
– Use clear bins so you can see what’s inside.
– Results you will notice: surfaces stay cleaner longer, dust has fewer places to settle, and you feel calmer in a tidy room.
– A decluttered room makes fall cleaning feel doable, not overwhelming.
– Create a simple declutter kit: cardboard boxes, sharpie labels, a trash bag.
– Do a 15-minute session in the living room or entry, then take a break.
– Plan a short daily tidy check to stop clutter from collecting again.
– Return items to their place after you use them.
– You can finish in under an hour if you stay focused.
5. Declutter Before You Clean
Editor’s Choice
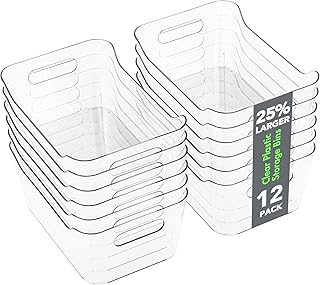
Tiawudi 12 Pack Plastic Storage Bins, Multi-Use Organizer Bins, Pantry O…

Brother P-Touch PT-N20 Personal Desktop Label Maker, Portable, Handheld …

Hefty Load & Carry Heavy Duty Contractor Large Trash Bags, 42 Gallon, 26…
6. Clean Out Your Closets

Fall is a good time to clear the space where your clothes live and breathe. A tidy closet makes mornings smoother and lets you see what you own. Here is a simple plan to refresh your wardrobe and your storage.
– Empty the closet completely to start fresh.
– Sort items into three piles: keep, donate, repair or replace.
– Try on questionable pieces to see if they still fit or spark joy.
– Pack off season clothes in labeled bins or slim boxes to free space.
– Wipe shelves and rods with a damp cloth. A mild cleaner helps dust and odors fade.
– Use space saving hangers and shelf dividers. Group clothes by type or color for quick access.
– Create zones that fit your life: everyday outfits at eye level, special pieces higher up, and bulky items in sturdy bins.
– Label bins so you know what is inside without digging.
Next steps: put back only what you will wear this season. Keep a donation bag handy and review the closet again in a few months. A neatly organized closet supports faster mornings and a calmer home. Want more space? Try a slim garment rack near the doorway to grab outfits quickly, or use clear bins.
6. Clean Out Your Closets
Editor’s Choice

10 PCS Space Saving Hangers, 5-Hole Magic Hangers – Sturdy Plastic Hange…

IRIS USA 32 Qt Stackable Plastic Storage Bins with Lids, 4 Pack – BPA-Fr…

Nelko Label Maker Machine with Tape, P21 Bluetooth Label Printer, Wirele…
7. Dust from Top to Bottom

Dust loves to cling to the top first. A good plan keeps it from crawling back down onto clean surfaces. This top-to-bottom dusting method makes deep cleaning feel simple and effective. Here is why it works and how to do it.
– Step 1: Start at the highest spots. Begin with ceiling fans, high shelves, and curtain rods. Wipe with a damp microfiber cloth to trap dust instead of sending it into the air. You’ll notice less dust falling as you work.
– Step 2: Use the right tool. An extendable duster reaches tall corners without a ladder. It helps you lift dust from the toughest spots without straining your back. Add a soft microfiber cloth for finished surfaces.
– Step 3: Dust before you vacuum. Dusting first catches loose particles so your vacuum can finish the job cleanly. Moving from top to bottom saves you time and effort.
– Step 4: Move down methodically. After the tops, work down to shelves, picture frames, light fixtures, and window sills. Finish with baseboards to pull out the last bits of dust.
– Step 5: Use vacuum power for edges. Attach a crevice tool to clean corners and along baseboards. This pulls dust from tight spaces you might miss by hand.
– Step 6: Tackle the air you breathe. Regularly change air or HVAC filters. Cleaner air means less dust circulating through your home.
– Step 7: Build a quick daily habit. Keep a small cloth handy for a quick wipe in the living room. A 5-minute sweep each week keeps dust from piling up.
With these steps, you’ll gain a clearer, fresher home. You’ll move faster, and your space will feel lighter and cleaner.
7. Dust from Top to Bottom
Editor’s Choice

OXO Good Grips Microfiber Extendable Duster 52 inches

Amazon Basics Microfiber Cleaning Cloths, Ultra Absorbent, Lint Free, St…

Shark Upright Vacuum, Navigator Lift-Away Deluxe with Large Dust Cup Cap…
8. Shine Up Your Fixtures

Your home shines when the small details glisten. Fixtures catch dust, fingerprints, and streaks fast. A quick clean lifts the whole room. Here is a simple method to brighten light fixtures and hardware without a lot of fuss.
Quick clean steps to shine your fixtures
– Use warm water mixed with a splash of white vinegar to lift grime from metal surfaces.
– Wipe with a soft microfiber cloth until you see a streak-free shine.
– Wipe doorknobs, cabinet handles, and light switches to remove fingerprints.
– For tight spots and ornate designs, reach in with a soft toothbrush.
– Check bulbs and swap any burnt-out ones so the space stays bright.
– Dry everything well and give it a final buff with a clean microfiber.
– If you have glass fixtures, finish with a glass cleaner for extra clarity.
– A quick shine can lift the feel of your home more than you might think.
Next steps: add this to your fall cleaning routine so it stays fresh.
8. Shine Up Your Fixtures
Editor’s Choice
USANOOKS Microfiber Cleaning Cloth Grey – 12 Pcs (12.5″x12.5″) – High Pe…

Amazon Saver, Distilled White Vinegar, Great for Cooking and Cleaning, 1…

Sprayway Glass Cleaner Aerosol Spray, 19 Oz, Pack of 2
You might also like


9. Tackle Your Bathroom Grime

Is your bathroom stuck in grime? You want it clean fast this fall without a long, messy project. Here is a plan you can do this weekend that really works.
– Prep the space: Clear countertops. Put towels away. Gather items in a small basket so you can wipe all surfaces without stopping.
– Grab the basics: A spray disinfectant, white vinegar, water, a scrub brush, a microfiber cloth, and a small squeegee. Keep a toothbrush for tight spots. A clean bath mat helps.
– Top to bottom: Start at the sink and counters. Wipe taps and the mirror. Move to the toilet and behind it, then tackle the shower curtain. Finish with the tub and grout lines.
– Gritty grime fix: For soap scum, spray equal parts white vinegar and water. Let it sit, then scrub with a brush. For mirrors, spray vinegar and wipe to a streak-free shine.
– Keep it fresh: After each shower, run a quick squeegee over glass and tiles. Wash bath mats and towels regularly so they feel clean and smell nice.
– Smart storage: Keep a small bathroom cleaning caddy in place for quick touchups. A tidy space makes daily cleaning easier.
– Extra tips: For stubborn grout, make a paste with baking soda and water. Apply, scrub with a brush, rinse well. Dry surfaces after cleaning to avoid water spots.
9. Tackle Your Bathroom Grime
Editor’s Choice
USANOOKS Microfiber Cleaning Cloth Grey – 12 Pcs (12.5″x12.5″) – High Pe…
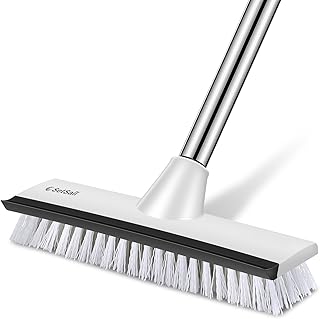
SetSail Floor Scrub Brush with 51-Inch Long Adjustable Handle 2 in 1 Scr…

JustHang Shower Squeegee for Glass Doors, All-One-Piece Silicone with Bu…
10. Revive Your Outdoor Spaces

Fall air feels fresh, and your outdoors can feel that way too. A quick refresh makes mornings, afternoons, and evenings outside more pleasant.
Start with a simple clean. Clear leaves and stray debris from paths and furniture. Hose down outdoor chairs and tables with mild soap. A gentle scrub lifts grime from seats and pillows.
For hard surfaces like a patio or deck, a pressure washer works wonders. Keep the nozzle away from boards and test on a small area first. If you don’t own one, a stiff brush and a bucket of soapy water still does the job.
Add color and comfort. Plant seasonal flowers or set up festive decorations to create a cozy nook. A small fall centerpiece on the table can lift the mood. Don’t forget to clean your grill so you’re ready for the next cookout.
– Store garden tools properly to avoid rust. Put gloves, shovels, and hoses in a shed or bin; wipe blades dry and hang items neatly.
– Layer an outdoor rug to soften the floor and make the space feel like a real room.
– Lighting sets the mood. Try string lights for a warm glow and choose weather-rated options to stay safe.
10. Revive Your Outdoor Spaces
Editor’s Choice
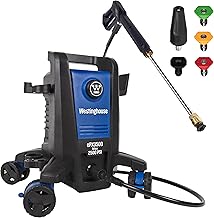
Westinghouse ePX3500 Electric Pressure Washer, 2500 Max PSI 1.76 Max GPM…

SAND MINE Waterproof Outdoor Rug 5×8 ft, Plastic Reversible Rug, Modern …

Brightever LED Outdoor String Lights 100FT Patio Lights with 52 Shatterp…
11. Organize Your Cleaning Supplies

Here is why organizing your cleaning supplies makes a big difference. A cluttered cabinet slows you down and adds stress. A tidy space helps you start fast and finish with less mess.
Why a tidy cabinet helps
– You know where everything sits
– You waste less time hunting for tools
– You reach for the right product every time
How to do it
– Gather all cleaning products, sponges, microfiber cloths, and tools in one spot.
– Sort items into clear bins or baskets. Group like with like: sprays together, cloths together, brushes together.
– Label each bin so you can grab what you need in a snap.
– Use vertical space with shelves or hooks for tools. This creates room on the shelves and keeps items in view.
– Keep a small trash or recycling bin inside or near the cabinet for tossing wrappers and empty containers.
Tips to keep it neat
– Regularly check expiration dates on cleaners to avoid weak or unsafe solutions.
– Keep frequently used items at eye level for easy access.
– Toss unused or duplicate items to cut clutter.
A quick setup example
In a small cabinet, place spray bottles on a lower shelf, towels in a bin, brushes on a hook, and spare sponges in a shallow basket. It should feel calm and ready.
Next steps
Set aside 15 minutes today to arrange your supplies. You’ll gain a quicker, cleaner routine.
A tidy cabinet isn’t just about looks; it’s your secret weapon for stress-free deep cleaning! When everything has its place, you’ll save time and tackle messes like a pro.
11. Organize Your Cleaning Supplies
Editor’s Choice

Sterilite 4-Pack Ultra Latching Box, Storage Bins with Lids, Clear Plast…
Brother P-Touch PT-N20 Personal Desktop Label Maker, Portable, Handheld …

JARLINK Over The Door Organizer Storage, 5 Shelf Hanging Door Organizer …
12. Refresh Your Air Quality

Fall air shifts with the weather. Inside your home, dust and odors can pile up fast. You can fix this and feel better. Here is how to refresh your air quality with simple steps.
– Air purifier – Choose a unit sized for the room. It traps dust, pollen, and smoke. This helps you breathe easier in daily life.
– Low-maintenance plants – Spider plant and snake plant are easy to care for. Place them in living rooms or near the kitchen. They clean air and add green color.
– Open windows after cleaning – When the weather is good, open a window for 5 to 10 minutes. Fresh air rushes in and odors fade.
– Scent without overpowering – A small essential oil diffuser with lemon or lavender adds a clean scent. Use just a few drops.
– Dust and care for vents – Wipe vents and registers once a month. Clean vents keep air moving smoothly.
– Check and replace filters – Set a reminder to inspect filters monthly. Change them as the label says or sooner if you notice a musty smell.
– Mind humidity – Aim for 40 to 50 percent humidity. Too dry or too damp makes air feel heavy and can irritate lungs.
– Limit extra fumes – Cover pots when you cook. Use the exhaust fan. Limit candles to cut indoor pollutants.
12. Refresh Your Air Quality
Editor’s Choice

LEVOIT Air Purifier for Home Allergies Pet Hair in Bedroom, Covers Up to…

Spider Plant Variety Pack – 4 Spider Plants Live House Plants – Ocean, H…

SALKING Essential Oil Diffuser, 100ml Small Aromatherapy Diffuser with A…
13. Use Lemon for Natural Cleaning

You want a clean home without harsh cleaners. Lemon helps. Its acidity cuts grease and stops bad smells. This simple trick uses what you already have in the kitchen.
Here is why lemon works. The juice lowers pH, loosening grime. It also leaves a bright citrus scent.
Make a cleaning paste. Mix lemon juice with a pinch of baking soda until it forms a paste. Rub it on counters, sinks, and tile grout. It tackles grime and freshens the room.
For the microwave, place a bowl of water with lemon slices inside. Heat it for two to three minutes. The steam loosens stuck bits, then a quick wipe makes the interior shine.
– Lemon peels on cutting boards can scrub away odors. Rub, rinse, and you’ll notice a cleaner surface.
– A dab of lemon juice with olive oil makes a simple wood polish. Wipe on, then buff lightly.
– Store lemon halves in the fridge in an airtight container to keep them bright and usable.
A quick note: lemon is powerful. It can etch some surfaces. Avoid natural stone like marble or limestone. If you’re unsure, test a small spot first.
Next steps: test lemon on a small area first, then clean with the paste or steam method.
13. Use Lemon for Natural Cleaning
Editor’s Choice
HOMEXCEL Microfiber Cleaning Cloth,12 Pack Cleaning Rags, Cleaning Towel…
14. Reorganize the Pantry

Fall is the perfect season to tidy your pantry. A clean space makes meals easier and cuts waste. You’ll reach for what you need, not what’s buried in a corner.
Here is why this works: when items sit in clear spots you see what you have, what’s near its date, and what you actually use.
Fast, simple pantry reset
– Empty the shelves and check every item’s date first. If it’s past, recycle it. If it’s near, plan a use-for-it meal.
– Sort by groups: canned goods, snacks, grains, bake items. Put similar items together so you know where to look.
– Use clear containers for dry goods. See-through jars and bins keep freshness and reveal when you’re running low.
– Label containers. Big, simple words let you grab the right thing at a glance.
– Put heavy items on lower shelves. It’s safer and keeps the pantry from tipping when you reach for a can.
– Do a quick pantry check before you grocery shop. It stops you from buying duplicates and helps plan a real list.
Next steps: add a small weekly routine to scan dates, wipe shelves, and rotate items so nothing gets forgotten. This simple makeover makes fall cooking calmer and more fun. You will feel in control.
14. Reorganize the Pantry
Editor’s Choice
Tiawudi 12 Pack Plastic Storage Bins, Multi-Use Organizer Bins, Pantry O…
Nelko Label Maker Machine with Tape, P21 Bluetooth Label Printer, Wirele…

NETANY 6-pack 16 oz Overnight Oats Containers with Lids, Glass jars with…
You Might Also Like


15. Clean Your Walls and Baseboards

Not long after you finish a deep clean, your walls can look dull again. Dust gathers, fingerprints show, and scuffs stand out. Here is a simple plan to refresh walls and baseboards quickly.
– What you need
– Microfiber cloth
– Warm water
– Mild detergent
– Optional magic eraser
– Ladder or stepping stool
– Soft sponge or old toothbrush
– Wall safe cleaner for tough spots
– How to clean walls
– Start high and work down. Wipe with a damp cloth in light, sweeping motions.
– For fingerprints or smudges, a tiny bit of detergent helps.
– For stubborn marks, use the magic eraser with gentle pressure.
– Rinse with a clean cloth as you go. Dry with a towel so you don’t leave water streaks.
– Let paint dry before you move furniture back in.
– How to clean baseboards
– Dust first with a dry cloth or a vacuum brush.
– Then wipe with the same soap and water solution you used on the walls.
– Dry well after cleaning.
– If your baseboards are wood, don’t soak them.
– Quick maintenance tips
– Do a quick wipe every month to cut down on deep cleans.
– Move furniture or use a ladder to reach high spots.
– Test cleaners on a hidden spot first to protect paint and finish.
A fresh wall and baseboard shine makes a room feel cleaner and brighter. It’s a small job with a big payoff.
15. Clean Your Walls and Baseboards
Editor’s Choice
USANOOKS Microfiber Cleaning Cloth Grey – 12 Pcs (12.5″x12.5″) – High Pe…

Mr. Clean Magic Eraser Original Cleaning Pads, Multi Purpose Cleaner, Ba…

CHOMP! Painted Wall Cleaner Spray: Healthier Home 5-Minute CleanWalls 4-…
16. Schedule Regular Maintenance

Keep the clean feeling with a simple maintenance plan
You want your home to stay fresh after the fall deep clean. A steady schedule makes that possible. Short daily steps, a few tasks each week, and bigger chores once a month add up without wearing you out.
– Daily tasks:
– Wash dishes and wipe counters as you go.
– Tidy rooms before bed so you wake to order.
– Wipe up spills right away to stop sticky messes.
– Weekly tasks:
– Vacuum floors and sweep high traffic areas.
– Clean the bathrooms and refresh towels.
– Dust surfaces and wipe kitchen fronts.
– Monthly tasks:
– Wash windows inside and wipe scuffs from walls.
– Declutter one closet or drawer.
– Clean the fridge shelves and toss old food.
Here is why this pace helps you.
This plan breaks big work into small bites. You see progress fast, so you stay motivated. If life gets busy, swap tasks around or move one from this month to next month.
Next steps:
– Use a calendar app or planner to set reminders. A ping on your phone keeps you on track.
– Pair cleaning with other routines, like grocery trips or laundry days.
– Involve the family. Give each person a simple job and post a small chart.
With steady effort, your home stays inviting and easy to maintain.
16. Schedule Regular Maintenance
Editor’s Choice

Large Cleaning Supplies Caddy Portable Shower Basket Supply Organizer wi…
USANOOKS Microfiber Cleaning Cloth Grey – 12 Pcs (12.5″x12.5″) – High Pe…
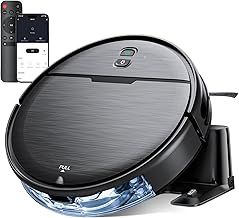
Robot Vacuum and Mop Combo, 2 in 1 Robotic Vacuums Cleaner with WiFi/App…
17. Utilize Multi-Use Cleaners

If you want to save time and keep your home neat, a good multi-surface cleaner can help. One bottle covers many chores, from kitchen counters to bathroom tiles. It keeps you focused and cuts down on waste.
Here is why this works. Fewer bottles mean less clutter on your shelf. A single spray can wipe away grime in several rooms. You save money when you do not buy many specialty cleaners.
What to look for
– A natural, eco-friendly all-purpose cleaner is safe for most surfaces you touch.
– A grease-cutting yet gentle formula helps you clean without damaging finishes.
– Refillable or concentrated options cut waste and save money.
How to use it well
– Keep the bottle in a handy spot in the kitchen or laundry room.
– Test a tiny patch first on a new surface.
– Spray, wipe, and rinse as needed.
Next steps
– Practice with one bottle on three jobs: counters, sinks, and tiles.
– Refill when the bottle is empty instead of buying a new one.
– Check surface compatibility with your home finishes.
This simple approach gives you a cleaner home with less clutter and steady results.
17. Utilize Multi-Use Cleaners
Editor’s Choice

MRS. MEYER’S CLEAN DAY All-Purpose Cleaner Spray, Cruelty Free Formula, …

Grove Co. Multi-Purpose Cleaner, Refill Concentrate (6 x 1 Fl Oz) Plant-…

Easy-Off Heavy Duty Degreaser Cleaner Spray, Kitchen Degreaser, 32 Oz
18. Embrace Minimalism

Fall cleaning can feel heavy. You want a calmer home with less clutter. Embracing minimalism can help you reach both goals. Here is how to start.
Begin with one room. Set a timer for 20 minutes. Pull everything out and ask a simple question: Do I truly use this or love it? If the answer is no, it goes to a new pile. Then sort what you keep into clear groups.
– Keep the essentials that you use every day or that bring you joy. Let go of items that no longer fit your life.
– Move to donate for items in good shape. Giving them a second life helps someone else and clears your space.
– Digitize what you can and store digital copies of papers, photos, or receipts. Less paper means less mess.
Decluttering is not a one-time task. Do this room by room, or even corner by corner. The goal is not perfect silence; it is a simpler, easier space.
Once you simplify, cleaning feels lighter. A calm room helps you breathe easier and think clearer. You’ll notice your mind follows the pace of your surroundings.
Next steps include keeping this rhythm. Set a brief monthly check-in to reassess what you own. If something sits unused for six months, it probably belongs elsewhere or out. Your home stays easier to tidy when you shop with intention.
Embrace minimalism this fall! A calmer home and clearer mind come from letting go of what no longer serves you. Start small—just 20 minutes can make a world of difference!
18. Embrace Minimalism
Editor’s Choice
Sterilite 4-Pack Ultra Latching Box, Storage Bins with Lids, Clear Plast…
Brother P-Touch PT-N20 Personal Desktop Label Maker, Portable, Handheld …

Epson WorkForce ES-50 Portable Sheet-Fed Document Scanner for PC and Mac
Conclusion

With fall upon us, it’s the perfect time to roll up your sleeves and embrace these deep cleaning hacks! Each tip offers a simple solution to invigorate your home and promote a welcoming atmosphere.
Take on one or two hacks per weekend, and soon you’ll have a beautifully refreshed space to enjoy this cozy season. It’s not just about cleaning; it’s about creating a home that feels good and invites warmth and joy in.
Note: We aim to provide accurate product links, but some may occasionally expire or become unavailable. If this happens, please search directly on Amazon for the product or a suitable alternative.
This post contains Amazon affiliate links, meaning I may earn a small commission if you purchase through my links, at no extra cost to you.
Frequently Asked Questions
What are some easy deep cleaning hacks for fall?
Fall is the perfect time to refresh your home with easy deep cleaning hacks. Start by using vinegar for streak-free windows, and tackle your appliances with baking soda for a gentle yet effective clean. Don’t forget to refresh your carpets with a DIY powder and sanitize your mattress to improve your sleep quality! These simple tips can make a big difference without taking up your entire weekend.
How often should I deep clean my home during the fall?
While it’s a good idea to deep clean your home at least once a season, fall is especially beneficial due to the change in weather. This is a great time to declutter and tackle those areas that accumulate dust and grime. Consider creating a regular maintenance schedule to keep your home feeling fresh all season long!
Can I use natural ingredients for deep cleaning?
Absolutely! Many natural ingredients are incredibly effective for deep cleaning. For instance, vinegar and lemon are fantastic for cutting through grease and odors without harsh chemicals. Baking soda is perfect for tackling grime on appliances and refreshing carpets. These natural solutions not only clean well but are also safe for your home and family!
What is the best way to organize my cleaning supplies?
A well-organized cleaning supply cabinet can make your deep cleaning tasks much easier! Start by grouping similar items together and using clear containers for easy visibility. Label everything, so you can grab what you need quickly. This not only saves time but also reduces stress when it’s time to clean. A tidy space for your supplies sets the tone for a successful deep cleaning session!
How do I maintain a clean home after deep cleaning for fall?
To keep that fresh feeling after your fall deep cleaning, implement a few simple daily habits. Try scheduling short cleaning tasks throughout the week, like wiping down surfaces or quickly vacuuming high-traffic areas. Additionally, embrace minimalism by decluttering regularly. This routine will help your home remain a welcoming space and prevent the buildup of dust and grime.
Related Topics
deep cleaning
fall cleaning
home organization
easy hacks
natural cleaners
minimalist home
DIY cleaning
quick tips
seasonal cleaning
appliance care
air quality
carpet refresh




Leave a Reply