Creating the perfect kids’ room can feel overwhelming, especially if you’re working with a tight budget. That’s why I put together this guide on DIY farmhouse kids’ room projects that won’t break the bank. Farmhouse style is all about warmth, charm, and practicality. It brings a cozy feel to any space, making it perfect for your little ones. The goal is to help you create a beautiful, inviting room that reflects your family’s personality without emptying your wallet. If you’re a parent or guardian looking for budget-friendly solutions that are both stylish and fun, this post is for you. Whether you’re a DIY novice or a seasoned crafter, these projects will inspire you to add that farmhouse touch to your child’s space. You’ll find projects that are easy to tackle, allowing you to bond with your little ones while making their room truly special. From rustic wall art to cozy reading nooks, every idea here will help you create a space that feels warm and welcoming. In this post, you’ll discover 15 DIY projects that combine creativity with practicality. You’ll learn how to craft unique decor items, create functional furniture, and personalize the room to suit your child’s tastes. With these ideas, you can turn any room into a lovely farmhouse retreat that your kids will adore. Get ready to roll up your sleeves and dive into these exciting projects that are all about making your DIY dreams come true!
Key Takeaways
– Discover 15 budget-friendly DIY projects that transform your kids’ room into a farmhouse-inspired haven. – Learn how to create functional items like farmhouse-style bookshelves and nightstands that add charm and utility. – Find fun decor ideas such as whimsical garlands and personalized name signs to bring character to the space. – Explore practical storage solutions that keep toys organized while staying true to the farmhouse aesthetic. – Enjoy creative projects that foster quality time with your kids, making their room a cozy and engaging environment.Contents
- 1. Rustic Wooden Wall Art
- 2. Farmhouse-Style Bookshelves
- 3. DIY Farmhouse Bed Frame
- 4. Chalkboard Wall for Creativity
- 5. DIY Farmhouse Nightstand
- 6. Whimsical Garland Decor
- 7. Upcycled Storage Solutions
- 8. Handmade Picture Frames
- 9. Vintage-Inspired Curtains
- 10. Farmhouse Style Toy Storage
- 11. Personalized Name Signs
- 12. Farmhouse Style Growth Chart
- 13. DIY Farmhouse Mobile
- 14. Farmhouse Style Wall Hooks
- 15. Cozy Reading Nook
1. Rustic Wooden Wall Art

Embrace the charm of farmhouse style with rustic wooden wall art in your child’s room. This design element not only adds a personal touch but also connects the space to nature. Using reclaimed wood, you can craft a piece that reflects your child’s interests, whether it’s their name, a favorite quote, or a playful animal shape. Imagine how inviting a wooden sign can be, brightening up the walls with warmth and character. Editor’s Choice
To make this project budget-friendly, consider sourcing reclaimed wood from old furniture or pallets. You can even involve your child in the design process, letting them choose colors or shapes to create a meaningful piece. This art serves as a focal point and ignites creativity in the room.
Consider these steps to create your wooden wall art:
– Gather reclaimed wood, paint, and tools.
– Cut wood into shapes or planks.
– Sand edges for a smooth finish.
– Paint or stain in colors that match decor.
– Hang your art in a prominent spot.
This project enhances the room’s aesthetic while teaching kids about sustainability. The blend of textures and natural materials creates a cozy atmosphere, making the space feel uniquely theirs.
Rustic Wooden Wall Art


2. Farmhouse-Style Bookshelves

Farmhouse-style bookshelves are perfect for balancing function and style in a child’s room. These shelves not only display your little one’s favorite stories but also help keep the area organized. Utilizing simple materials like plywood and wooden dowels, you can create a charming and sturdy bookshelf that grows with your child.
Consider making this project budget-friendly by using leftover wood or finding inexpensive materials at your local hardware store. Personalizing the shelf with your child’s favorite colors can make it even more special. This piece can transition from a book display to a showcase for trophies or cherished photos as your child matures.
Here’s how to build your farmhouse bookshelf:
– Measure the space and sketch a design.
– Cut plywood to size for shelves and back.
– Assemble using wood glue and screws.
– Stain or paint to match the decor.
– Secure to the wall for safety.
By incorporating quirky bookends, you can inspire your child to take pride in their reading collection. The warm wood tones and classic design enhance the room’s overall appeal, making it a lovely addition to their space.
DIY kids room shelving isn’t just storage—it’s farmhouse-style charm you’ll treasure. With simple plywood and wooden dowels, you build sturdy shelves that grow with your child and your budget. Pro tip: reuse scrap wood to save money and add a personal touch.
Farmhouse-Style Bookshelves
Editor’s Choice


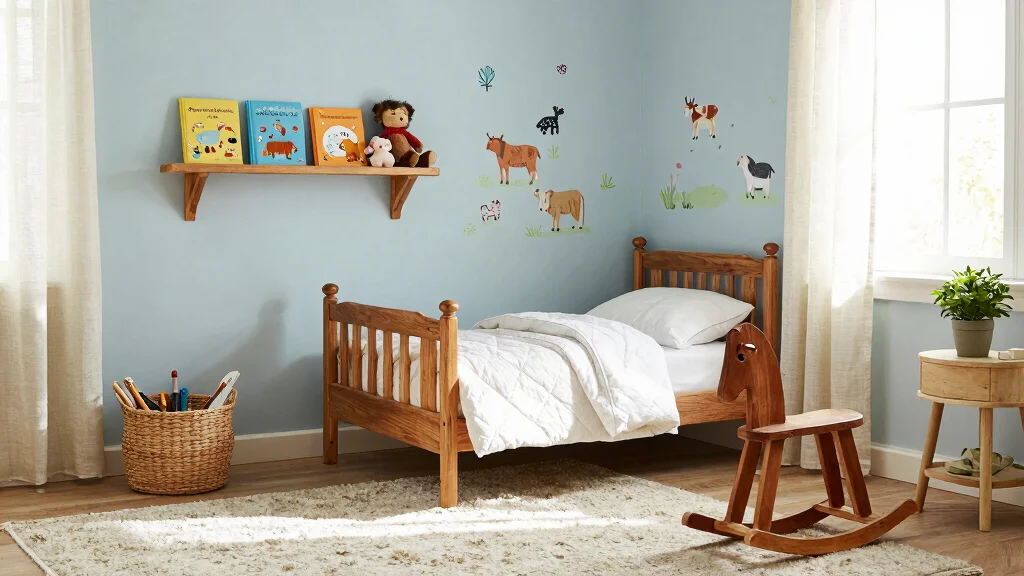
3. DIY Farmhouse Bed Frame

Transform your child’s sleeping area with a DIY farmhouse bed frame that exudes rustic charm. This project not only elevates the room’s aesthetic but also provides a sturdy foundation for restful nights. By using simple materials like wood and screws, you can create a beautiful frame that stands the test of time.
To keep costs low, consider using reclaimed wood or leftover materials from other projects. Involve your child in choosing the finish, whether it be a clean paint job or a distressed look for added character. This bed frame can become a central piece that reflects their personality and style.
Follow these steps to create your farmhouse bed frame:
– Choose dimensions based on mattress size.
– Cut wood for the headboard, footboard, and rails.
– Assemble and reinforce joints with screws.
– Sand and paint or stain for a polished look.
– Add a mattress and cozy bedding.
This bed frame not only serves as a beautiful centerpiece but also encourages your child to express their creativity through their choice of bedding. The natural textures and finishes enhance the overall design, creating a warm and inviting atmosphere.
4. Chalkboard Wall for Creativity

Encourage your child’s artistic flair with a chalkboard wall that serves as a canvas for creativity. This fun addition not only brightens the room but also provides a space for endless imagination. With just chalkboard paint and a bit of preparation, you can transform a simple wall into a vibrant focal point.
Make this project more affordable by using leftover paint and choosing a less prominent wall space. Framing the chalkboard area with wood can enhance the farmhouse aesthetic, making it feel more intentional. This interactive feature invites your child to express themselves daily.
Here’s how to create your chalkboard wall:
– Choose a visible wall space.
– Clean and tape edges for neat lines.
– Apply chalkboard paint in even coats.
– Let your child decorate with chalk once dry.
This project not only saves space by reducing the need for scattered art supplies but also promotes creativity in a playful way. The addition of a charming frame or border enhances the overall décor, making it a delightful feature in their room.
📹 Related Video: Watch this BEFORE you paint a chalkboard on your wall!
5. DIY Farmhouse Nightstand

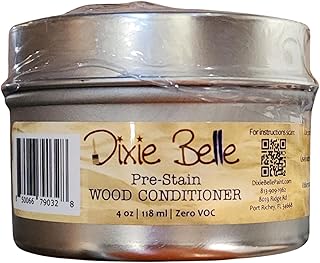
Elevate your child’s room with a DIY farmhouse nightstand that combines style and practicality. This project is not only easy on the wallet but also allows you to use reclaimed wood or repurpose old furniture, adding a unique touch to the space. A well-crafted nightstand provides storage for bedtime stories and personal treasures, enhancing the room’s functionality. Editor’s Choice
For a budget-friendly option, consider scouring thrift stores or garage sales for old furniture that can be revamped. Personalizing the nightstand with paint or decorative elements can make it truly special. This piece can grow with your child, adapting to their changing needs over time.
Follow these steps to build your farmhouse nightstand:
– Gather materials like wood, paint, and screws.
– Prepare the base materials as needed.
– Build the frame and add a top surface.
– Sand for a smooth finish.
– Paint or stain to match the decor.
Incorporating extra storage options, like a drawer or shelf, can help keep their space tidy. The rustic feel of the nightstand adds warmth and character, making it a cozy addition to their room.
DIY Farmhouse Nightstand


6. Whimsical Garland Decor

Add a playful touch to your child’s room with a whimsical garland that showcases their personality. Creating your own farmhouse-style garland is a delightful craft that brings color and creativity to the walls. You can use fabric scraps, twine, or even paper to design eye-catching decorations that reflect your child’s interests.
This project can be made budget-friendly by using leftover materials or items you already have at home. Involving your child in the creation process allows for a fun bonding experience as they choose colors and shapes that resonate with them. This garland can easily be changed with the seasons or as their tastes evolve.
Here’s how to make your whimsical garland:
– Gather materials: fabric scraps, twine, and scissors.
– Cut shapes like hearts or stars from the fabric.
– Attach the shapes onto the twine using glue.
– Hang the garland creatively around the room.
This fun decor element adds character and charm, making the space feel more personalized. The playful designs and colors enhance the overall ambiance, inviting creativity and joy into your child’s sanctuary.
Crafting a whimsical garland is a simple way to let your DIY kids room shine without breaking the bank. Use scraps and twine, involve your child, and watch their personality color every wall. Small, budget-friendly projects add big farmhouse charm rain or shine.
How To Choose DIY Farmhouse Kids Room Decor
When you decide to give your child’s room a delightful farmhouse touch, it’s essential to choose decor elements that suit both their personality and the overall style. Here are some crucial factors to consider to create a budget-friendly and stylish DIY farmhouse kids room. 1. Style InspirationBefore you begin, think about what farmhouse style means for you and your child. Is it rustic charm, a modern twist, or cozy vintage? Look for inspiration in magazines, online platforms like Pinterest, or local boutiques. Create a mood board to visualize the color palette and decor styles that resonate with both you and your child. This will help you stay focused on your theme while shopping for materials.
2. Size and Scale
Take measurements of your child’s room to ensure the decor fits well. Consider the size of furniture pieces like beds, bookshelves, and toys. A large bookshelf may look stunning, but it could overwhelm a small room. Use painter’s tape to outline where furniture will go. This way, you can visualize the space better. Remember, balance is key in achieving a cohesive look.
3. Material Choices
Farmhouse style often leans toward natural materials like wood, metal, and cotton. Choose sturdy and safe materials that can withstand the wear and tear of a child’s room. For instance, reclaimed wood for shelves or a DIY bed frame adds that rustic touch. Ensure any textiles are machine washable for easy maintenance. Look for eco-friendly options too, as they are often healthier for your child and the environment.
4. Functional Features
Consider how each piece of decor will function in the room. Will it serve a dual purpose? For example, a DIY nightstand can also offer storage for books or toys. Farmhouse-style toy boxes can keep clutter at bay while looking stylish. Prioritize features that add value without sacrificing aesthetics. This strategic approach helps you create an organized and charming space.
5. Budget Considerations
Set a clear budget for your project. Farmhouse decor can range from affordable to high-end, so it’s wise to plan. Look for sales, thrift store finds, or even DIY projects that can save you money. You can often find wooden pallets or old furniture that can be transformed into beautiful pieces with a little creativity. Having a budget will guide your decision-making process and keep your spending in check.
6. Personal Touches
Last but not least, add personal touches that reflect your child’s personality. This could mean incorporating their favorite colors or themes, like animals or stars. Involve your child in the selection process. They might enjoy making artwork to hang, crafting a personalized growth chart, or choosing their favorite books to display. This will make the room feel even more special.
Pro Tip: Always keep your child’s growth in mind. Choose decor that can grow with them, like adjustable shelving or a bed that can change in size. This way, you won’t have to redo the room too soon, saving both time and money!
Creating a DIY farmhouse kids room can be a fun and rewarding experience. By focusing on style, size, materials, functionality, budget, and personal touches, you can design a space that is both beautiful and practical. Happy decorating!
7. Upcycled Storage Solutions

Effective storage solutions are essential in a child’s room, and upcycling is a fantastic way to achieve this with farmhouse style. Consider using old crates, baskets, or bins to create unique storage that not only organizes toys and books but also adds rustic charm to the decor. This eco-friendly approach teaches kids the value of sustainability while creating a visually appealing space.
To keep costs low, look for sturdy items at thrift stores or online marketplaces. Involve your child in decorating and labeling the storage solutions, making them feel invested in their space. This hands-on project fosters creativity and connection to their environment.
Here’s how to create your upcycled storage:
– Find used crates or baskets in good condition.
– Sand down rough edges and paint if desired.
– Arrange them creatively around the room.
– Label each container for easy access.
Using a mix of shapes and sizes can add an eclectic look to the room. This storage solution not only helps keep things organized but also makes tidying up a fun activity for your child.
You might also like

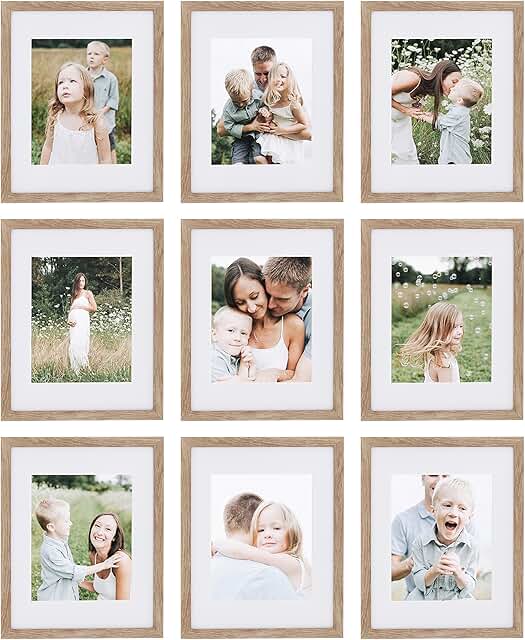
8. Handmade Picture Frames

Adding personal touches to a child’s room makes it feel special, and handmade picture frames are a perfect way to showcase their favorite memories. Crafting unique frames from wood or cardboard adds a farmhouse charm while highlighting family photos or their artwork. This project encourages creativity and allows for cherished moments to be displayed prominently. Editor’s Choice
For a budget-friendly approach, consider using leftover wood or inexpensive materials. Involving your child in the design process can make this a fun bonding activity, as they choose colors and decorations that reflect their personality. These frames can be arranged in a gallery wall or scattered throughout the room.
Here’s how to create your handmade picture frames:
– Choose materials: wood or sturdy cardboard.
– Cut to size, allowing for a border around the picture.
– Decorate with paint or embellishments.
– Attach a backing for secure display.
– Hang or place the frames around the room.
Each frame tells a story, making the room feel alive with memories. The combination of textures and colors enhances the overall decor, creating a warm and inviting atmosphere.
Handmade Picture Frames


9. Vintage-Inspired Curtains

Curtains play a key role in setting the mood of a room, and vintage-inspired curtains can bring a soft, farmhouse feel while controlling light. This DIY project is a fun way to refresh the room’s look without a significant investment. You can sew them yourself or repurpose old sheets or fabric into beautiful panels that match the decor.
When selecting fabric, involve your child in the decision-making process to create a sense of ownership. Choosing cheerful patterns or colors can lighten up the space. This is also a great way to incorporate their style into the overall design.
Here’s how to make your vintage-inspired curtains:
– Measure the window for fabric requirements.
– Choose fabric that fits the room’s theme.
– Hem the edges to prevent fraying.
– Create pockets for curtain rods or use clips.
– Install with a curtain rod of your choice.
Layering these curtains with sheer fabrics can add texture and light filtering, making the room feel cozy and inviting. This simple yet effective project enhances the overall aesthetic, creating a warm ambiance that your child will love.
10. Farmhouse Style Toy Storage

Finding attractive storage solutions for toys can often be a challenge, but with a farmhouse-style twist, it can blend seamlessly into the room’s decor. Creating open shelving or using decorative baskets allows you to keep toys organized while maintaining a stylish look. This not only declutters but also encourages children to participate in clean-up.
To keep costs down, consider using natural materials like wicker or wooden crates. Labeling baskets with chalkboard stickers can add a charming farmhouse touch. Engaging your child in the organization process can make tidying up feel like a fun game.
Here’s how to create your farmhouse toy storage:
– Choose sturdy baskets or open shelves.
– Label each basket for easy identification.
– Arrange toys by category for organization.
– Paint shelves to match the room’s theme.
This approach helps develop your child’s organizational skills while making the room visually appealing. The combination of function and style enhances the overall decor, creating a space that feels both inviting and practical.
11. Personalized Name Signs

Adding a personalized name sign to your child’s room can create a unique identity and a sense of belonging. Using wood or canvas, you can craft a name sign that reflects their interests and personality. This simple yet impactful decor piece enhances the farmhouse theme beautifully while making the space feel more personal. Editor’s Choice
Consider involving your child in the design process, allowing them to choose colors and shapes that resonate with them. This project can be a wonderful way to bond while crafting something meaningful. The name sign becomes a cherished keepsake that grows with your child.
Here’s how to craft your personalized name signs:
– Gather materials: wood or canvas, paint, and brushes.
– Decide on size and shape for the sign.
– Paint the base color and let it dry.
– Add the child’s name in contrasting color.
– Hang it prominently in the room.
This creative endeavor beautifies the space while helping your child feel more at home. Adding fun elements like stars or animals can enhance the design, making it a treasured piece in their room.
Personalized Name Signs


12. Farmhouse Style Growth Chart

Documenting your child’s growth can create cherished memories, and a farmhouse-style growth chart offers a beautiful way to do it. This project is easy to make and can be personalized to fit your child’s room decor, turning it into a fun family activity. It will not only track milestones but also serve as a sentimental decor piece.
Choose materials that match the room’s aesthetic, and involve your child in marking their heights. This interactive element can foster excitement around their growth journey. A beautifully crafted growth chart can become a lovely feature on the wall, telling a story over the years.
Here’s how to create your farmhouse growth chart:
– Choose a sturdy piece of wood or canvas.
– Mark growth increments using paint or carved lines.
– Hang it at a child-friendly height.
– Use a marker to record your child’s height.
This chart can become a nostalgic keepsake that captures their journey as they grow. Personalizing it with fun designs adds to the charm, blending seamlessly with the farmhouse decor.
You Might Also Like

13. DIY Farmhouse Mobile

A DIY farmhouse mobile can infuse whimsy and charm into your child’s room. This creative project offers endless possibilities to reflect your child’s personality and interests. Using natural materials like twigs and fabric, you can create a mobile that adds a playful touch to the decor.
To keep costs manageable, gather materials from nature or use scraps you have at home. Engaging your child in the design process allows for a unique creation that they can cherish. This mobile can be customized seasonally or as their interests evolve over time.
Here’s how to create your farmhouse mobile:
– Gather materials: twigs, string, and decorative elements.
– Create a base structure using twigs tied together.
– Hang decorative elements from the base.
– Secure everything tightly and test for balance.
This mobile will not only serve as a decorative element but also inspire imagination and wonder. The blend of textures and colors enhances the room’s atmosphere, making it a special focal point in their space.
14. Farmhouse Style Wall Hooks

Functional and stylish, wall hooks are a great addition to any kid’s room, especially in a farmhouse setting. Creating your decorative wall hooks not only provides a place for coats and bags but also enhances the overall decor. This project is simple and can be completed in a few easy steps.
Selecting wooden boards and sturdy hooks allows you to personalize the look to match the room’s theme. Involving your child in the color and placement decisions can make it a fun project, fostering a sense of ownership over their space. These hooks can add both utility and charm to the room.
Here’s how to create your farmhouse wall hooks:
– Choose wooden boards and sturdy hooks.
– Sand and paint the wood to match decor.
– Attach hooks evenly spaced on the board.
– Secure the board to the wall at a child-friendly height.
These personalized wall hooks offer a practical storage solution while adding a decorative touch to the room. The combination of function and style enhances the overall look, making it easier for kids to keep their space organized.
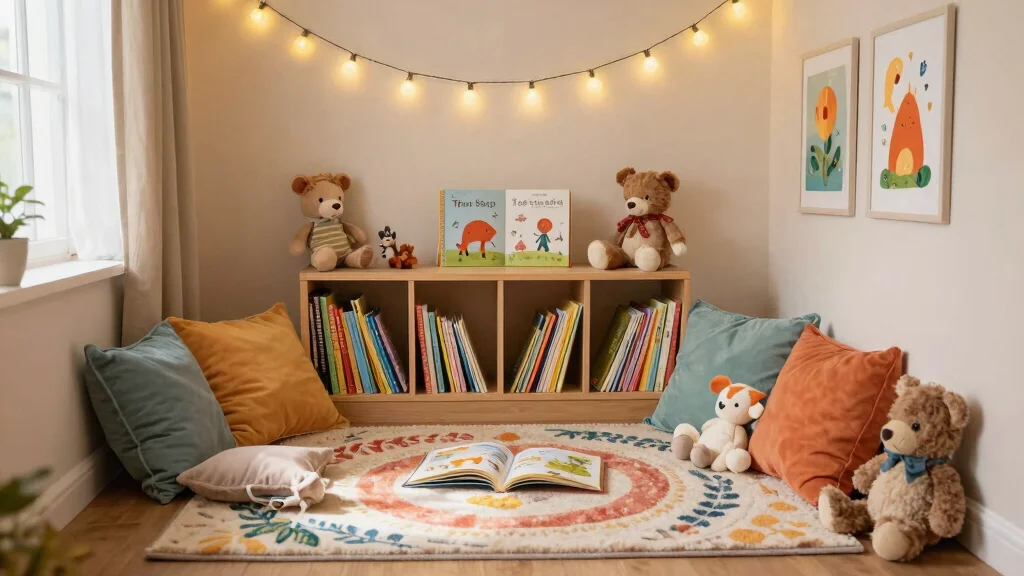
15. Cozy Reading Nook

Every child deserves a cozy reading nook that invites them to escape into the world of books. A farmhouse-style reading nook can be a delightful addition to their room, creating a comforting space for daydreaming and storytelling. Use pillows, blankets, and a few DIY elements to craft a comfortable haven that encourages a love for reading.
To create a budget-friendly nook, repurpose furniture or use soft materials you already have at home. Involving your child in designing the nook allows them to express their style and preferences. This personalized space can become their favorite retreat, fostering a lifelong love for literature.
Consider these steps to create a cozy reading nook:
– Choose a quiet corner with good natural light.
– Add comfortable chairs or floor cushions.
– Incorporate shelves or baskets for books.
– Hang a soft fabric canopy for an inviting touch.
This nook will become a cherished spot for your child, where they can relax and enjoy their favorite stories. Adding fairy lights can enhance the cozy ambiance, making it a magical place to unwind.
A cozy reading nook doesn’t have to break the bank—start with a thrifted chair, soft blankets, and budget-friendly pillows. Let your child pick colors and DIY farmhouse touches to create a space they’ll reach for every day.
Conclusion

Creating a farmhouse-inspired kids’ room doesn’t have to be expensive or overwhelming. With these 15 DIY projects, you can beautify the space while keeping it functional and stylish. Each project not only adds charm and personality but also creates memorable moments spent crafting with your children. So gather those supplies and let your creativity flow! Whether you choose to tackle one project or all, you’ll find joy in transforming your child’s space into a cozy haven bursting with love and style. Note: We aim to provide accurate product links, but some may occasionally expire or become unavailable. If this happens, please search directly on Amazon for the product or a suitable alternative. This post contains Amazon affiliate links, meaning we may earn a small commission if you purchase through our links, at no extra cost to you.
Frequently Asked Questions
What’s a great starter DIY farmhouse project for a budget-friendly DIY kids room?
Starting small is key for a budget-friendly DIY kids room. A great starter project is a pallet-style headboard or a simple floating shelf that fits the farmhouse style. Here’s a quick path to get you going:
1) Pick a project from the article’s 15 DIY farmhouse kids room projects.
2) Gather affordable, reusable materials from a hardware store or repurpose scraps.
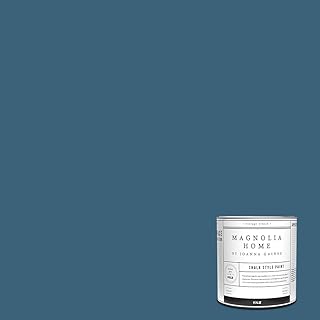
3) Sand, paint in a warm neutral (cream, taupe, soft gray), and seal with a kid-safe finish.
4) Install safely at kid height or above the bed to keep little hands safe.
5) Style with budget-friendly accents like burlap ribbons, chalkboard signs, or metal cues. This approach proves you can keep it budget-friendly while delivering big farmhouse style in a DIY kids room.
How can I create farmhouse style in a kids room without breaking the bank?
To achieve farmhouse style in a kids room without breaking the bank: start with a neutral base and layer texture. Paint walls in a warm white, ivory, or soft beige; add natural wood tones through DIY projects; use budget-friendly pieces like a crate shelf, galvanized metal bins, and a chalkboard panel. Add textiles: plaid curtains, ticking stripe pillow covers, a jute rug. Reuse and repurpose: shutters as a window treatment, beadboard panels, picture ledges. Keep the color palette cohesive and let one bold accent (black hardware, metal basket) anchor the room. With a few thoughtful pieces, you’ll get a authentic farmhouse style look that’s budget-friendly.
What are some easy, budget-friendly storage and organization ideas for a farmhouse kids room?
Smart, budget-friendly storage ideas for a farmhouse kids room: 1) Build a low cube shelf from pine boards or repurpose a wooden crate organizer. 2) Hang a pegboard wall for art supplies and small toys. 3) Use fabric bins on a sturdy bookcase or a repurposed dresser. 4) Create under-bed drawers with rolling bins. 5) Use mason jars or metal canisters for small items and labeling. Steps: measure space, pick a sturdy mounting plan, assemble, paint to match the room, and label contents for easy cleanup. These ideas keep clutter in check while staying true to the farmhouse style and budget-friendly vibe.
What tools and materials are best for beginner DIY farmhouse projects in a kids room?
Beginner-friendly tools and materials for DIY farmhouse projects in a kids room: basics like a cordless drill, screwdriver set, sandpaper, tape measure, level, a utility knife, and a few brushes or rollers. For materials: pine boards, plywood, scrap wood, and budget-friendly paint. Pro tips: buy in a bundle, look for sales, and consider secondhand tools. Safety first: wear goggles, remove hazards, and secure shelves to studs. Start with one easy project and then tackle more. This keeps the project on track and aligns with the DIY kids room goals and farmhouse style.
How can I personalize a DIY farmhouse kids room as my child grows?
Personalizing a DIY farmhouse kids room as your child grows: plan with flexibility in mind. Choose adjustable furniture (a bed with built-in drawers or a desk that can adapt to homework and crafts). Use modular storage that can reconfigure as needs change. Rotate art with a simple gallery wall, swap out textiles seasonally, and keep a chalkboard wall or dry-erase panel for ongoing creativity. Involve your child in picking colors and accents to ensure the room stays relevant. Steps: define a timeless base palette, select a few adjustable pieces, and schedule small refreshes every season to maintain the farmhouse style while keeping it budget-friendly.


Leave a Reply