I put this together because Thanksgiving dessert can feel like a pressure cooker. You want something that tastes like a celebration but won’t keep you stuck in the kitchen all day. Why I made this This post rounds up 12 classic Thanksgiving pies that will steal the show without stealing your time. You’ll find reliable pies and plain-spoken tips to help them bake just right.
Who it’s for If you host a crowd, cook for picky eaters, or want a dessert that travels well, this one is for you. These pies are meant to be doable on a busy day and loved by guests of all ages. They bring warmth, aroma, and a sense of home to the table.
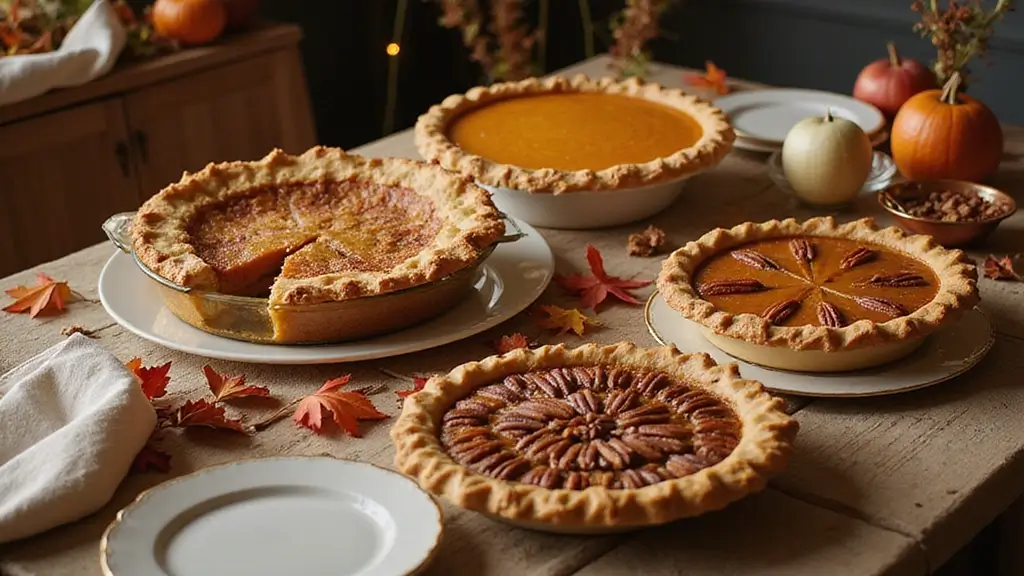
What you’ll get Twelve pies that cover the big favorites from pumpkin and apple to pecan and sweet potato, plus a couple creamy crowd-pleasers. Each pie comes with a simple crust idea and a filling that sets up smooth and flavorful. You’ll also see easy tweaks to keep things within reach when your oven space is tight.
Start with practical steps you can use now. Make the crust a day ahead, chill the dough, and blind bake when needed. Plan to bake pies in stages so the oven stays free for the main course. Small tricks help you get a crisp edge and a glossy filling that holds its shape.
These pies also travel well for potlucks or family dinners. You’ll learn how to store pies, freeze them for a few weeks, and still serve them fresh. I include dairy swaps and crust ideas so you can adapt a pie for guests with simple preferences.
So grab an apron, pick a couple of pies that fit your table, and get a plan in place. With these 12 classics, you can keep the vibe warm and familiar while delivering a memorable finish. Ready to bake?
Contents
- 1. Classic Pumpkin Pie
- 2. Pecan Pie Perfection
- 3. Apple Pie with a Twist
- 4. Sweet Potato Pie Surprise
- 5. Chocolate Cream Pie for the Chocoholics
- 6. Coconut Cream Pie Dream
- 7. Cherry Pie with a Kiss
- 8. Lemon Meringue Pie Delight
- 9. Buttermilk Pie for the Brave
- 10. Blueberry Pie Bliss
- 11. Rhubarb Pie for the Adventurous
- 12. Maple Cream Pie for the Sweet Tooth
1. Classic Pumpkin Pie

Classic Pumpkin Pie takes the stage at any Thanksgiving table. You want a dessert that feels cozy. You want one that smells great in the kitchen. This pie delivers.
There’s something magical about a classic pumpkin pie baking in the oven during Thanksgiving. The warm spices, the creamy filling, that golden flaky crust… it just feels like home. This recipe is simple, comforting, and absolutely foolproof — even if you’re not a pro baker.
Let’s make a pie your family will definitely ask for again next year.
✨ Ingredients
For the Pie Filling
-
1 can (15 oz) pumpkin purée (not pumpkin pie mix)
-
1 cup evaporated milk
-
2 large eggs
-
¾ cup brown sugar
-
1 teaspoon ground cinnamon
-
½ teaspoon nutmeg
-
½ teaspoon ground ginger
-
¼ teaspoon ground cloves
-
¼ teaspoon salt
-
1 teaspoon vanilla extract
For the Crust
You can absolutely use a store-bought pie crust (no shame!), but if you want homemade:
-
1 ¼ cups all-purpose flour
-
½ teaspoon salt
-
1 tablespoon sugar
-
½ cup cold unsalted butter, cubed
-
3–4 tablespoons ice water
🥧 Step-by-Step Instructions
1. Make the Pie Crust (or skip if using store-bought)
-
In a large bowl, mix the flour, sugar, and salt.
-
Add the cold butter and cut it into the flour using your fingers or a pastry cutter until it looks like coarse crumbs.
-
Add ice water, 1 tablespoon at a time, until the dough comes together.
-
Form into a disk, wrap in plastic, and chill for at least 30 minutes.
-
Roll out the dough and gently place it into a 9-inch pie dish. Trim the edges and crimp as you like.
2. Make the Filling
-
In a mixing bowl, whisk together the pumpkin, brown sugar, spices, and salt.
-
Add the eggs and whisk until smooth.
-
Stir in the evaporated milk and vanilla.
-
The filling should look creamy and silky — this is your sign it’s perfect.
3. Assemble & Bake
-
Preheat your oven to 425°F (220°C).
-
Pour the pumpkin filling into your pie crust.
-
Bake at 425°F for 15 minutes, then lower the temperature to 350°F (175°C) and bake for 40–45 minutes.
-
Your pie is done when the edges are set and the center jiggles just slightly (it will finish setting as it cools).
🍂 Let It Cool
Let your pumpkin pie cool for at least 2 hours before slicing. This helps it set properly and gives you clean, beautiful slices.
🥄 Serve It With…
-
A big dollop of whipped cream
-
A sprinkle of cinnamon
-
Vanilla ice cream (for the rebels in the family)
💛 Final Thoughts
This pumpkin pie is nostalgic, cozy, and everything Thanksgiving should taste like. It’s the kind of dessert that brings everyone back to the kitchen for “just one more slice.”
If you make it, tag @DIYBeyond — I’d love to see your beautiful pies!
1. Classic Pumpkin Pie
Editor’s Choice

Mora Ceramic Deep Fluted Pie Dish for Baking – 9 inch Porcelain Pie Plat…


EurKitchen Professional Aluminum Whipped Cream Dispenser – Leak-Free Whi…
2. Pecan Pie Perfection

If there’s one pie that screams “holiday dessert table,” it’s pecan pie. Sticky, caramel-like filling… that beautiful golden top layer of toasted pecans… and a flaky crust holding it all together. It’s rich, comforting, and ridiculously easy to make (seriously — this is one of the simplest pies on the planet).
This classic pecan pie recipe is the one you’ll come back to every Thanksgiving.
✨ Ingredients
For the Filling
-
1 cup light corn syrup
-
1 cup granulated sugar
-
3 large eggs
-
½ cup unsalted butter, melted
-
1 teaspoon vanilla extract
-
¼ teaspoon salt
-
1 ½ cups pecan halves
For the Crust
Use store-bought for convenience or make it from scratch:
-
1 ¼ cups all-purpose flour
-
½ teaspoon salt
-
1 tablespoon sugar
-
½ cup cold unsalted butter, cubed
-
3–4 tablespoons ice water
🥧 Step-by-Step Instructions
1. Prepare the Crust
(Or skip this part and pop your store-bought crust straight into your pie dish.)
-
Mix flour, salt, and sugar in a bowl.
-
Add cold butter and work it into the mixture until it looks like coarse crumbs.
-
Add ice water a tablespoon at a time until the dough comes together.
-
Wrap, chill 30 minutes, and roll into a 9-inch pie dish.
2. Make the Filling
This part is unbelievably simple.
-
In a medium bowl, whisk together the corn syrup, sugar, eggs, melted butter, vanilla, and salt.
-
Stir in the pecan halves.
-
Pour everything right into the pie crust. (The pecans will naturally float to the top!)
3. Bake It
-
Preheat oven to 350°F (175°C).
-
Bake for 55–65 minutes, until the center is mostly set but still slightly jiggly.
-
If the crust edges start to brown too quickly, cover them with foil.
The pie will continue to set as it cools — so resist slicing early (I know, it’s hard!).
🍂 Cool & Serve
Let your pecan pie cool completely, at least 2–3 hours, before cutting.
Serve with:
-
Whipped cream
-
Vanilla ice cream
-
A pinch of flaky salt (trust me… heavenly)
💛 Final Thoughts
This pecan pie is rich, buttery, and everything a holiday dessert should be. It’s one of those pies that makes people close their eyes on the first bite — especially when it’s still a tiny bit warm.
Save this one to your Thanksgiving recipe arsenal. It’s timeless.
2. Pecan Pie Perfection
Editor’s Choice

Amazon Basics Silicone Rectangular Baking Mat, Non-Stick Reusable Oven B…


3. Apple Pie with a Twist

There’s just something about a homemade apple pie that feels like a hug. When the buttery crust meets those tender cinnamon-spiced apples… it’s the kind of dessert that fills your whole home with that classic “holiday” smell.
This version uses Granny Smith apples, the star of all baking apples — tart, sturdy, and perfect for holding their shape while still becoming soft and buttery inside the pie.
If you want a recipe that tastes like tradition, this is the one.
🍏 Ingredients
For the Filling
-
6–7 Granny Smith apples, peeled, cored, and thinly sliced
-
¾ cup granulated sugar
-
¼ cup brown sugar
-
2 tablespoons all-purpose flour
-
1 teaspoon ground cinnamon
-
¼ teaspoon nutmeg
-
¼ teaspoon salt
-
1 tablespoon lemon juice
-
1 teaspoon vanilla extract
-
2 tablespoons butter, cut into small pieces
For the Crust
Use store-bought for convenience, or homemade:
-
2 ½ cups all-purpose flour
-
1 teaspoon salt
-
1 tablespoon sugar
-
1 cup (2 sticks) cold unsalted butter, cubed
-
6–8 tablespoons ice water
🥧 Step-by-Step Instructions
1. Make the Pie Crust (or skip if using store-bought)
-
Mix flour, sugar, and salt in a large bowl.
-
Add the cold butter and cut it in until the mixture looks like coarse crumbs.
-
Add ice water one tablespoon at a time until the dough pulls together.
-
Divide into two disks, wrap, and chill for at least 1 hour.
2. Prepare the Apple Filling
-
In a big bowl, combine the sliced apples with granulated sugar, brown sugar, flour, cinnamon, nutmeg, salt, lemon juice, and vanilla.
-
Toss until everything is evenly coated.
-
Let it sit for 10 minutes — the apples will start releasing juice and deepen the flavor.
3. Assemble the Pie
-
Preheat oven to 425°F (220°C).
-
Roll out one disk of dough and place it in a 9-inch pie dish.
-
Add the apple mixture.
-
Dot the top of the apples with small pieces of butter.
-
Roll out the second crust and place it on top — you can do a full cover or a lattice design.
-
Trim the edges, crimp them, and cut a few slits on top if using a full crust.
Brush with:
-
1 egg beaten with 1 tablespoon water (optional, for a golden top)
-
Sprinkle with a little sugar
4. Bake
-
Bake at 425°F for 15 minutes.
-
Reduce heat to 350°F (175°C) and bake for 40–45 minutes, until the crust is golden and the filling is bubbling.
-
If the edges brown too quickly, cover them with foil.
🍂 Cooling Time
Let your apple pie cool for at least 2 hours.
This helps the filling thicken and keeps slices pretty.
🍨 Serve It With
-
A scoop of vanilla ice cream (the classic combo)
-
Whipped cream
-
A drizzle of caramel sauce if you want it extra cozy
💛 Final Thoughts
This Granny Smith apple pie hits that perfect balance of sweet + tart, with a buttery flaky crust that makes every bite feel like pure comfort. It’s the kind of pie that disappears fast — so you might want to make two.
Elevate your Thanksgiving pie game! A hint of cinnamon and tart Granny Smith apples can turn a classic apple pie into a showstopper that delights every guest at your table.
3. Apple Pie with a Twist
Editor’s Choice
Amazon Basics Silicone Rectangular Baking Mat, Non-Stick Reusable Oven B…
Mora Ceramic Deep Fluted Pie Dish for Baking – 9 inch Porcelain Pie Plat…

PrepWorks Dishwasher Safe Apple Slicer and Corer – 16-Slice Thin Apple C…
4. Sweet Potato Pie Surprise

If Thanksgiving had a heart, sweet potato pie would be it. It’s creamy, warmly spiced, naturally sweet, and has that down-home, comforting flavor that reminds you of family gatherings and laughter in the kitchen. This recipe keeps things simple and classic—just the way sweet potato pie should be.
It’s the kind of pie that melts in your mouth and makes everyone ask, “Who made this?!”
🍠 Ingredients
For the Sweet Potatoes
-
2 large sweet potatoes (or 3 medium), peeled and cut into chunks
-
Water for boiling
For the Filling
-
2 cups mashed sweet potatoes (about what you get from the potatoes above)
-
½ cup unsalted butter, softened
-
1 cup granulated sugar
-
½ cup evaporated milk
-
2 large eggs
-
1 teaspoon vanilla extract
-
1 teaspoon ground cinnamon
-
½ teaspoon ground nutmeg
-
¼ teaspoon salt
For the Crust
Use store-bought or homemade:
-
1 ¼ cups all-purpose flour
-
½ teaspoon salt
-
1 tablespoon sugar
-
½ cup cold unsalted butter, cubed
-
3–4 tablespoons ice water
🥧 Step-by-Step Instructions
1. Cook the Sweet Potatoes
-
Add the peeled sweet potato chunks to a pot of boiling water.
-
Cook until very soft—about 20–25 minutes.
-
Drain well and mash until completely smooth. (You want a silky mash, not chunky.)
2. Prepare the Crust (if making homemade)
-
Mix flour, sugar, and salt.
-
Cut cold butter into the flour mixture until crumbly.
-
Add ice water until it forms a dough.
-
Roll out and gently place into a 9-inch pie dish.
3. Make the Filling
-
In a large bowl, mix the warm mashed sweet potatoes with the softened butter.
-
Add sugar and stir until well combined.
-
Whisk in the eggs, evaporated milk, vanilla, cinnamon, nutmeg, and salt.
-
Stir until the mixture is completely smooth and creamy.
4. Assemble & Bake
-
Preheat your oven to 350°F (175°C).
-
Pour the filling into your prepared pie crust.
-
Bake for 50–60 minutes, or until the center is set and only slightly jiggles.
-
If the crust edges start browning too fast, cover them with foil.
🍂 Let It Cool
Sweet potato pie tastes best when fully cooled.
Let it sit for at least 2 hours before slicing, or refrigerate for an even firmer texture.
🍨 Serve It With
-
Whipped cream
-
A sprinkle of cinnamon
-
A drizzle of maple syrup (so good!)
-
Or honestly… just a fork. It’s perfect on its own.
💛 Final Thoughts
This sweet potato pie is smooth, creamy, and perfectly spiced—classic Southern comfort in every bite. It’s simple, nostalgic, and guaranteed to earn a permanent spot on your Thanksgiving table.
Sweet potato pie is the cozy hug your Thanksgiving table needs—creamy, rich, and oh-so-delicious. Add a pinch of orange zest, and you’ve got a flavor twist that makes every bite a celebration!
4. Sweet Potato Pie Surprise
Editor’s Choice
Mora Ceramic Deep Fluted Pie Dish for Baking – 9 inch Porcelain Pie Plat…

Deiss PRO Citrus Lemon Zester & Cheese Grater — Parmesan Cheese, Lemon, …
EurKitchen Professional Aluminum Whipped Cream Dispenser – Leak-Free Whi…
5. Chocolate Cream Pie for the Chocoholics

If you’ve ever wished dessert could taste like a giant hug made of chocolate, this is your pie. Chocolate cream pie is smooth, silky, rich, and cool—making it the perfect “I need something indulgent right now” kind of dessert.
This version hits that sweet spot between homemade and easy. It’s classic, creamy, and absolutely unforgettable. Chocoholics… welcome home.
🍫 Ingredients
For the Crust
(Use either one—it’s amazing both ways.)
Oreo Cookie Crust (recommended for chocoholics):
-
25 Oreo cookies
-
5 tablespoons melted butter
OR Classic Pie Crust:
-
1 ¼ cups all-purpose flour
-
½ teaspoon salt
-
1 tablespoon sugar
-
½ cup cold unsalted butter, cubed
-
3–4 tablespoons ice water
For the Chocolate Filling
-
1 cup sugar
-
¼ cup cornstarch
-
¼ teaspoon salt
-
3 cups whole milk
-
4 large egg yolks
-
6 ounces semi-sweet chocolate, chopped
-
2 tablespoons unsalted butter
-
1 teaspoon vanilla extract
For the Topping
-
1 ½ cups heavy whipping cream
-
3 tablespoons powdered sugar
-
1 teaspoon vanilla extract
-
Chocolate curls or shaved chocolate (optional but beautiful)
🥧 Step-by-Step Instructions
1. Make the Crust
For Oreo crust:
-
Crush Oreos into fine crumbs (food processor makes it easy).
-
Mix with melted butter.
-
Press firmly into a 9-inch pie dish.
-
Bake at 350°F for 8 minutes OR chill for 30 minutes if you prefer a no-bake version.
For classic crust:
-
Mix flour, sugar, and salt.
-
Cut in cold butter until crumbly.
-
Add ice water until dough forms.
-
Roll out and place in a pie dish.
-
Blind bake at 375°F for 15–18 minutes.
2. Make the Chocolate Filling
This is where the magic happens.
-
In a saucepan, whisk together sugar, cornstarch, and salt.
-
Slowly whisk in the milk.
-
Cook over medium heat, whisking constantly until thick and bubbly.
-
In a separate bowl, whisk the egg yolks.
-
Slowly pour some of the hot mixture into the yolks (this tempers them).
-
Pour the yolk mixture back into the saucepan.
-
Continue cooking for 2–3 minutes until thick, smooth, and pudding-like.
-
Remove from heat and add chopped chocolate, butter, and vanilla.
-
Stir until everything is completely melted and silky.
3. Fill the Crust
-
Pour the warm chocolate filling into your prepared crust.
-
Smooth the top.
-
Cover with plastic wrap directly on the surface (prevents a skin).
-
Chill for at least 4 hours, preferably overnight.
3. Make the Whipped Cream
-
Beat heavy cream, powdered sugar, and vanilla until soft peaks form.
-
Spread or pipe on top of the chilled pie.
-
Garnish with chocolate curls for extra drama.
🍽️ Serve It
Slice, serve cold, and enjoy every creamy, rich, chocolatey bite.
It’s the kind of dessert people close their eyes for.
💛 Final Thoughts
This Chocolate Cream Pie is pure indulgence—silky chocolate filling, a buttery crust, and a cloud of whipped cream on top. It’s simple, luxurious, and absolutely addictive. Chocoholics will claim this pie as their new personality.
5. Chocolate Cream Pie for the Chocoholics
Editor’s Choice

Callebaut Belgian Dark Couverture Chocolate Semisweet Callets, 54.5% – 5…
EurKitchen Professional Aluminum Whipped Cream Dispenser – Leak-Free Whi…
Mora Ceramic Deep Fluted Pie Dish for Baking – 9 inch Porcelain Pie Plat…
6. Coconut Cream Pie Dream

If sunshine had a flavor, it would taste like coconut cream pie.
There’s something magical about that silky coconut filling, the cloud of whipped cream, and that golden, buttery crust. It’s soft, creamy, lightly sweet, and just a little tropical without trying too hard.
This Coconut Cream Pie is the kind of dessert that makes people pause mid-bite and say, “Oh wow… this is incredible.”
Dreamy, airy, and unbelievably good — your readers will fall in love with it.
🥥 Ingredients
For the Crust
Use a classic crust or go for a graham cracker crust — both are amazing.
Classic Pie Crust:
-
1 ¼ cups all-purpose flour
-
½ teaspoon salt
-
1 tablespoon sugar
-
½ cup cold unsalted butter, cubed
-
3–4 tablespoons ice water
or Graham Cracker Crust:
-
1 ½ cups graham cracker crumbs
-
⅓ cup sugar
-
6 tablespoons melted butter
For the Coconut Filling
-
1 cup sugar
-
⅓ cup cornstarch
-
¼ teaspoon salt
-
3 cups whole milk
-
4 large egg yolks
-
1 ½ cups sweetened shredded coconut
-
2 tablespoons butter
-
1 teaspoon vanilla extract
-
½ teaspoon coconut extract (optional but so good)
For the Whipped Cream Topping
-
1 ½ cups heavy whipping cream
-
3 tablespoons powdered sugar
-
1 teaspoon vanilla
-
Toasted coconut for topping
🥧 Step-by-Step Instructions
1. Make the Crust
Classic crust:
-
Mix flour, salt, and sugar.
-
Cut in cold butter until crumbly.
-
Add ice water until dough forms.
-
Roll out into a 9-inch dish.
-
Blind bake at 375°F for 15–18 minutes.
Graham cracker crust:
-
Mix crumbs, sugar, and melted butter.
-
Press into a pie dish.
-
Bake at 350°F for 8–10 minutes, or chill for a no-bake version.
2. Make the Coconut Filling
This part turns into the creamiest, dreamiest pudding ever.
-
In a medium saucepan, whisk together sugar, cornstarch, and salt.
-
Slowly whisk in the milk until no lumps remain.
-
Cook over medium heat, whisking constantly, until thick and bubbling.
-
In a separate bowl, whisk the egg yolks.
-
Slowly pour some of the hot mixture into the yolks to temper.
-
Pour yolk mixture back into the pot.
-
Cook for another 2–3 minutes until thick, smooth, and pudding-like.
-
Remove from heat and stir in butter, vanilla, coconut extract, and shredded coconut.
It should feel thick, glossy, and absolutely heavenly.
3. Fill & Chill
-
Pour the warm coconut filling into your baked crust.
-
Smooth the top.
-
Cover with plastic wrap directly on the surface to prevent a skin.
-
Refrigerate for at least 4 hours, ideally overnight.
4. Whipped Cream Topping
-
Beat heavy cream, powdered sugar, and vanilla until soft peaks form.
-
Spread or pipe generously over the chilled pie.
-
Top with toasted coconut for a beautiful, golden finish.
(To toast: spread coconut in a pan and heat at 350°F for 4–6 minutes, stirring halfway. Watch closely!)
🍽️ Serve It
Cold, creamy, coconutty perfection.
Each bite feels like a mini vacation.
💛 Final Thoughts
This Coconut Cream Pie is exactly what the name suggests — a dream. It’s light but rich, simple yet luxurious, and always a crowd favorite. Whether it’s for a holiday table or a lazy Sunday, this pie brings sunshine to the moment.
6. Coconut Cream Pie Dream
Editor’s Choice

Simply Asia Unsweetened Coconut Milk, 13.66 fl oz – One 13.66 Ounce Can …
EurKitchen Professional Aluminum Whipped Cream Dispenser – Leak-Free Whi…
Mora Ceramic Deep Fluted Pie Dish for Baking – 9 inch Porcelain Pie Plat…
You might also like

12 Savory Pumpkin Dishes That Are Perfect for Cozy Nights (You Won't Believe How Good #4 Is!) – DIY & Beyond

10 Unique Sweet Potato Desserts That Will Blow Your Mind (Dessert Lovers Rejoice!) – DIY & Beyond
7. Cherry Pie with a Kiss

If desserts could flirt, this cherry pie would be the one blowing kisses from across the room.
It’s bright, juicy, just the right amount of tart, and wrapped in a golden flaky crust that tastes like pure comfort.
This Cherry Pie With a Kiss is the kind of recipe that makes people smile before they even take the first bite. It’s classic, simple, and full of that warm, nostalgic “made with love” energy.
Perfect for holidays… or honestly, any day you need a little sweetness.
🍒 Ingredients
For the Filling
-
5 cups pitted tart cherries (fresh or frozen)
-
1 cup granulated sugar
-
¼ cup cornstarch
-
1 tablespoon lemon juice
-
¼ teaspoon almond extract (this is the kiss — don’t skip it!)
-
¼ teaspoon vanilla extract
-
¼ teaspoon salt
For the Crust
Use store-bought or homemade:
-
2 ½ cups all-purpose flour
-
1 teaspoon salt
-
1 tablespoon sugar
-
1 cup (2 sticks) cold unsalted butter, cubed
-
6–8 tablespoons ice water
Finishing Touch
-
1 egg beaten with 1 tbsp water (egg wash)
-
A sprinkle of sugar for sparkle
🥧 Step-by-Step Instructions
1. Make the Pie Crust (or grab your store-bought hero)
-
Mix flour, salt, and sugar in a bowl.
-
Add cold butter and cut it into the flour until you have pea-sized crumbs.
-
Add ice water a tablespoon at a time until the dough comes together.
-
Divide into two disks, wrap, and chill for at least 1 hour.
2. Prepare the Cherry Filling
-
If using frozen cherries: thaw and drain well.
-
In a large bowl, combine cherries, sugar, cornstarch, lemon juice, almond extract, vanilla, and salt.
-
Mix gently until the cherries are coated and glossy.
Let it sit for 10 minutes — this helps everything meld together.
3. Assemble the Pie
-
Preheat oven to 425°F (220°C).
-
Roll out one disk of dough and place it into a 9-inch pie dish.
-
Pour in the cherry mixture (including the juices).
-
Dot the top with tiny pieces of butter if you want extra richness (optional).
-
Roll out the second crust and place it on top — full cover or a pretty lattice.
-
Trim and crimp the edges.
-
Brush with egg wash and sprinkle with sugar.
4. Bake
-
Bake at 425°F for 15 minutes.
-
Reduce heat to 350°F (175°C) and bake for 40–45 minutes more, until the crust is golden and the filling is bubbling.
-
If the edges start to brown too quickly, cover them with foil.
🍒 Cooling Time = Perfect Slices
Let your cherry pie cool for at least 2–3 hours.
This is where the magic happens — the filling settles, thickens, and becomes slice-perfect.
🍨 Serve It With
-
Vanilla ice cream (iconic)
-
Whipped cream
-
A drizzle of melted chocolate if you want to get romantic
💛 Final Thoughts
Cherry Pie With a Kiss is sweet, tart, and full of cozy charm. It’s a pie that tastes like summer sunshine and warm hugs all at once. The almond extract gives it that special “kiss” of flavor that makes it unforgettable.
This one will definitely steal hearts.
7. Cherry Pie with a Kiss
Editor’s Choice


8. Lemon Meringue Pie Delight

Lemon Meringue Pie Delight
Lemon meringue pie is the kind of dessert that instantly lifts your mood — like sunshine on a plate.
The silky lemon filling is bright and tangy, the crust is buttery and flaky, and that fluffy, toasted meringue on top? Pure cloud-like magic.
This Lemon Meringue Pie Delight is fresh, dreamy, and surprisingly simple. If you love desserts that feel light yet elegant, this one is going to steal your heart.
🍋 Ingredients
For the Crust
Use store-bought or homemade:
-
1 ¼ cups all-purpose flour
-
½ teaspoon salt
-
1 tablespoon sugar
-
½ cup cold unsalted butter, cubed
-
3–4 tablespoons ice water
For the Lemon Filling
-
1 ½ cups sugar
-
⅓ cup cornstarch
-
¼ teaspoon salt
-
1 ½ cups water
-
3 large egg yolks, lightly beaten
-
2 tablespoons butter
-
½ cup freshly squeezed lemon juice
-
1 tablespoon lemon zest
For the Meringue
-
3 large egg whites
-
½ cup sugar
-
½ teaspoon vanilla extract
-
¼ teaspoon cream of tartar (helps stabilize the meringue)
🥧 Step-by-Step Instructions
1. Make the Pie Crust
-
Mix flour, sugar, and salt in a bowl.
-
Cut in the cold butter until it resembles coarse crumbs.
-
Add ice water until the dough just comes together.
-
Roll out and place into a 9-inch pie dish.
-
Blind bake at 375°F for 15–18 minutes, until lightly golden.
Let the crust cool while you prepare the filling.
2. Make the Lemon Filling
-
In a saucepan, whisk together sugar, cornstarch, and salt.
-
Slowly whisk in the water until smooth.
-
Cook over medium heat, stirring constantly, until thick and bubbling.
-
Temper the egg yolks by slowly whisking some of the hot mixture into them.
-
Pour yolks back into the saucepan and cook for another 1–2 minutes.
-
Remove from heat and stir in butter, lemon juice, and lemon zest.
The filling should be glossy, silky, and smell like pure sunshine.
3. Prepare the Meringue
-
In a clean bowl, beat egg whites and cream of tartar until soft peaks form.
-
Slowly add sugar, a spoonful at a time.
-
Add vanilla and continue beating until stiff, glossy peaks form.
(Tip: Make meringue right before topping the pie so it sticks to the warm filling and won’t separate.)
4. Assemble the Pie
-
Pour the hot lemon filling into your baked crust.
-
Spoon the meringue on top, making sure to seal it all the way to the edges of the crust — this prevents shrinking.
-
Create pretty swirls with a spoon.
5. Bake
Bake at 350°F for 10–12 minutes, or until the meringue is lightly golden and beautifully toasted on top.
🍋 Let It Cool
Cool for at least 2 hours before slicing.
The filling needs time to set into that perfect, silky texture.
🍨 Serve It With
Honestly? Lemon meringue pie shines all on its own.
But if you want extras:
-
Fresh berries
-
Light whipped cream
-
A sprinkle of extra lemon zest
💛 Final Thoughts
Lemon Meringue Pie Delight is bright, refreshing, and a little whimsical — the kind of dessert that makes everyone at the table smile. The mix of tangy lemon and sweet, airy meringue is pure magic.
This pie feels fancy but is wonderfully simple to make… and trust me, it disappears fast.
8. Lemon Meringue Pie Delight
Editor’s Choice

TBTEEK Butane Torch, Kitchen Torch Cooking Torch with Safety Lock & Adju…
Deiss PRO Citrus Lemon Zester & Cheese Grater — Parmesan Cheese, Lemon, …
9. Buttermilk Pie for the Brave

Buttermilk Pie is one of those old-school Southern desserts that doesn’t get the spotlight it deserves — but once you taste it, you never forget it. It’s creamy, tangy, lightly sweet, and has this bold, custardy richness that feels both comforting and exciting.
This is the pie for the brave…
For the ones who like to try something different, something nostalgic, something unexpectedly amazing.
If you’ve never had Buttermilk Pie before, get ready — it’s a sleeper hit.
🥛 Ingredients
For the Filling
-
1 ½ cups sugar
-
3 tablespoons all-purpose flour
-
3 large eggs
-
1 cup buttermilk
-
½ cup unsalted butter, melted and cooled slightly
-
1 tablespoon fresh lemon juice
-
1 teaspoon vanilla extract
-
¼ teaspoon nutmeg
-
¼ teaspoon salt
For the Crust
Use store-bought or homemade:
-
1 ¼ cups all-purpose flour
-
½ teaspoon salt
-
1 tablespoon sugar
-
½ cup cold unsalted butter, cubed
-
3–4 tablespoons ice water
🥧 Step-by-Step Instructions
1. Prepare the Crust
-
Mix flour, sugar, and salt.
-
Cut in cold butter until crumbly.
-
Add ice water until dough forms.
-
Roll into a 9-inch pie dish.
-
Blind bake at 375°F for 12–15 minutes (don’t skip — this keeps the bottom crisp).
2. Make the Filling
-
In a large bowl, whisk together sugar and flour.
-
Add the eggs and whisk until smooth.
-
Pour in the buttermilk, melted butter, lemon juice, vanilla, nutmeg, and salt.
-
Mix until the filling is creamy and well combined.
The mixture will be thin — this is exactly how it should be.
3. Bake the Pie
-
Preheat oven to 350°F (175°C).
-
Pour the filling into your warm, pre-baked crust.
-
Bake for 45–55 minutes, or until the top is lightly golden and the center has only a gentle wobble.
-
If the edges brown quickly, cover them with foil.
As the pie cools, it will settle into a silky, custard-like texture with a slightly crackled top — totally normal and very charming.
4. Cooling Time
Let it cool for at least 2 hours before slicing.
Buttermilk pie tastes even better chilled, so don’t be afraid to refrigerate it.
🍽️ Serve It With
-
Powdered sugar dusted on top
-
Fresh berries
-
A dollop of whipped cream
-
Or nothing at all — it truly holds its own
💛 Final Thoughts
Buttermilk Pie for the Brave is sweet, tangy, silky, and full of cozy Southern heart. It’s simple enough for a weeknight but special enough for the holidays.
This is the pie that turns first-time tasters into lifelong fans. One slice and you’ll understand why this old-fashioned recipe has survived generation after generation.
9. Buttermilk Pie for the Brave
Editor’s Choice

Organic Valley, Organic Low Fat Cultured Buttermilk, Pasteurized, Quart,…

Professional Nutmeg Grinder with Sharp Blade for Whole Nutmeg, Powder Fi…

NileHome Stainless Steel Whisk Set 8″ 10″ 12″ Kitchen Whisk Balloon Whis…
10. Blueberry Pie Bliss

10. Blueberry Pie Bliss
There’s something magical about blueberry pie. It’s simple, beautiful, and tastes like pure summer happiness — even if you’re making it in the middle of fall.
The filling turns deep purple and glossy, the crust gets golden and flaky, and every bite is sweet, tangy, and honestly… blissful.
This Blueberry Pie Bliss recipe is everything a fruit pie should be: juicy (but not runny!), bright, cozy, and unbelievably delicious. Your kitchen will smell like a blueberry dream.
💙 Ingredients
For the Filling
-
5 cups fresh or frozen blueberries
-
¾ cup granulated sugar
-
¼ cup brown sugar
-
¼ cup cornstarch
-
1 tablespoon lemon juice
-
1 teaspoon lemon zest
-
¼ teaspoon cinnamon (optional — but adds warmth!)
-
¼ teaspoon salt
For the Crust
Use store-bought or homemade:
-
2 ½ cups all-purpose flour
-
1 teaspoon salt
-
1 tablespoon sugar
-
1 cup (2 sticks) cold unsalted butter, cubed
-
6–8 tablespoons ice water
Finishing Touch
-
1 egg beaten with 1 tbsp water (egg wash)
-
Sugar for sprinkling
🥧 Step-by-Step Instructions
1. Make the Pie Crust
-
Mix flour, sugar, and salt in a bowl.
-
Cut in cold butter until pea-sized bits form.
-
Add ice water a little at a time until the dough comes together.
-
Divide into two disks, wrap, and chill for 1 hour.
2. Prepare the Blueberry Filling
-
In a large bowl, combine blueberries, granulated sugar, brown sugar, cornstarch, lemon juice, lemon zest, cinnamon, and salt.
-
Mix gently until coated.
-
Let it sit for 10 minutes so the blueberries release some juice.
(Frozen blueberries work great — no need to thaw! Just increase baking time slightly.)
3. Assemble the Pie
-
Preheat oven to 425°F (220°C).
-
Roll out one dough disk and place into a 9-inch pie dish.
-
Pour in the blueberry filling.
-
Roll out the second crust and place on top — lattice or full cover.
-
Trim, tuck, and crimp the edges.
-
Brush with egg wash and sprinkle with sugar.
4. Bake
-
Bake at 425°F for 15 minutes.
-
Reduce heat to 350°F (175°C) and bake for 40–50 minutes more, until the filling is bubbling and the crust is golden.
-
If the edges brown too quickly, cover with foil.
Bubbling is important — that means the cornstarch has activated and the filling will set perfectly.
💙 Cool Before Slicing
Let your blueberry pie cool for at least 2–3 hours.
This keeps the filling thick, sliceable, and gorgeous.
🍨 Serve It With
-
Vanilla ice cream
-
Lemon zest whipped cream
-
A drizzle of warm blueberry sauce
💛 Final Thoughts
Blueberry Pie Bliss is exactly that — bliss. Sweet, juicy berries, a buttery crust, and that perfect hint of lemon that brings everything to life.
It’s nostalgic and cozy, but also vibrant and fresh.
The kind of pie that turns an ordinary day into something special.
A slice of blueberry pie brings the essence of fall to your Thanksgiving table. With a burst of juicy berries and a hint of lemon zest, it’s not just dessert – it’s a celebration!
10. Blueberry Pie Bliss
Editor’s Choice

365 By Whole Foods Market, Frozen Pie Dough, 19.7 Ounce


Clabber Girl Non-GMO Corn Starch, Gluten Free, 6.5 Ounce
You Might Also Like

15 Rustic Fall Table Settings That'll Make Your Guests Swoon (Wait Until You See #9!) – DIY & Beyond
11. Rhubarb Pie for the Adventurous

Rhubarb Pie for the Adventurous
Rhubarb pie is not for the faint of heart — and that’s exactly why it’s amazing.
It’s bright, tangy, a little wild, and absolutely unforgettable. The kind of dessert that wakes up your taste buds and makes you say, “Wow… why don’t we make this more often?”
If you love trying flavors that are bold and exciting, this Rhubarb Pie for the Adventurous is your next obsession.
It’s old-fashioned, dramatic, and delicious in a way that only rhubarb can be.
🌺 Ingredients
For the Filling
-
5 cups chopped rhubarb (fresh or frozen)
-
1 ¼ cups sugar
-
¼ cup cornstarch
-
1 tablespoon lemon juice
-
1 teaspoon vanilla extract
-
¼ teaspoon ground cinnamon (optional)
-
¼ teaspoon salt
For the Crust
Homemade or store-bought:
-
2 ½ cups all-purpose flour
-
1 teaspoon salt
-
1 tablespoon sugar
-
1 cup (2 sticks) cold unsalted butter, cubed
-
6–8 tablespoons ice water
Finishing Touch
-
1 egg beaten with 1 tbsp water
-
Sugar for sprinkling
🥧 Step-by-Step Instructions
1. Make the Pie Crust
-
Mix flour, sugar, and salt in a bowl.
-
Cut in cold butter until the texture resembles coarse crumbs.
-
Add ice water, a tablespoon at a time, until the dough comes together.
-
Divide into two disks, wrap, and chill for at least 1 hour.
2. Prepare the Rhubarb Filling
-
In a large bowl, combine rhubarb, sugar, cornstarch, lemon juice, vanilla, cinnamon (if using), and salt.
-
Toss gently until coated.
-
Let it sit for about 10 minutes — rhubarb releases a bit of juice, which helps the filling thicken beautifully.
Note:
If using frozen rhubarb, do not thaw. Just add an extra tablespoon of cornstarch.
3. Assemble the Pie
-
Preheat oven to 425°F (220°C).
-
Roll out one dough disk into a 9-inch pie dish.
-
Pour in the rhubarb filling.
-
Roll out the second disk and place on top — full cover or lattice both work beautifully.
-
Trim, fold, and crimp the edges.
-
Brush with egg wash and sprinkle with sugar.
4. Bake
-
Bake at 425°F for 15 minutes.
-
Reduce heat to 350°F (175°C) and bake for 40–50 minutes more.
-
The filling should be bubbling and the crust golden.
If the edges brown too quickly, cover them with foil.
🌺 Cool Before Slicing
Cool the pie for at least 2–3 hours.
This ensures the filling sets perfectly and the slices hold together.
🍨 Serve It With
-
Vanilla ice cream (classic)
-
Whipped cream
-
A sprinkle of powdered sugar
-
Or enjoy it plain — rhubarb is a showstopper on its own
💛 Final Thoughts
Rhubarb Pie for the Adventurous is daring, bright, and incredibly delicious.
It’s a little old-school, a little edgy, and a whole lot of flavor packed into one pie. If you’re someone who loves trying new things — or bringing a surprising dish to the table — this pie will absolutely thrill you.
It’s bold. It’s beautiful. It’s unforgettable.
11. Rhubarb Pie for the Adventurous
Editor’s Choice
Mora Ceramic Deep Fluted Pie Dish for Baking – 9 inch Porcelain Pie Plat…

Spring Chef Dough Blender, Top Professional Pastry Cutter with Heavy Dut…

The Book On Pie: Everything You Need to Know to Bake Perfect Pies
12. Maple Cream Pie for the Sweet Tooth

If you love desserts that feel like a warm hug, this Maple Cream Pie is going to steal your heart.
It’s creamy, silky, lightly spiced, and sweet in the most natural, comforting way — thanks to real maple syrup.
This pie tastes like fall wrapped in a blanket.
It’s rich without being heavy, comforting without trying too hard, and unbelievably delicious if you’re a certified sweet tooth.
🍁 Ingredients
For the Crust
You can use store-bought or homemade:
-
1 ¼ cups all-purpose flour
-
½ teaspoon salt
-
1 tablespoon sugar
-
½ cup cold unsalted butter, cubed
-
3–4 tablespoons ice water
For the Maple Cream Filling
-
1 cup pure maple syrup (Grade A or B — both work!)
-
1 cup heavy cream
-
½ cup milk
-
¼ cup cornstarch
-
¼ cup brown sugar
-
4 large egg yolks
-
2 tablespoons unsalted butter
-
1 teaspoon vanilla extract
-
¼ teaspoon salt
-
¼ teaspoon cinnamon (optional but dreamy)
For the Whipped Topping
-
1 ½ cups heavy cream
-
3 tablespoons powdered sugar
-
1 teaspoon vanilla extract
-
Extra maple drizzle for finishing
🥧 Step-by-Step Instructions
1. Make the Pie Crust
-
Mix flour, sugar, and salt.
-
Cut in the cold butter until crumbly.
-
Add ice water until the dough comes together.
-
Roll out and press into a 9-inch pie dish.
-
Blind bake at 375°F for 15–18 minutes, until lightly golden.
Let cool completely.
2. Make the Maple Cream Filling
This filling is silk. Pure silk.
-
In a saucepan, whisk together cornstarch, brown sugar, and salt.
-
Slowly whisk in the milk and heavy cream until smooth.
-
Add the maple syrup and stir.
-
Cook over medium heat, whisking constantly, until thick and bubbling.
-
In a separate bowl, whisk the egg yolks.
-
Slowly pour some of the hot mixture into the yolks to temper them.
-
Pour yolk mixture back into the saucepan and cook for another 1–2 minutes.
-
Remove from heat and stir in butter, vanilla, and cinnamon (if using).
The result should be glossy, smooth, and absolutely heavenly.
3. Fill & Chill
-
Pour the warm maple filling into your cooled pie crust.
-
Smooth the top.
-
Press plastic wrap directly onto the filling surface (prevents a skin).
-
Chill for 4 hours minimum, overnight for best results.
4. Make the Whipped Topping
-
Beat heavy cream, powdered sugar, and vanilla until soft peaks form.
-
Spread thick, fluffy clouds of whipped cream on top of the chilled pie.
-
Drizzle with a little maple syrup for that sweet, glossy finish.
🍁 Serve It With
-
Crispy maple-candied nuts
-
A sprinkle of cinnamon
-
A drizzle of maple syrup
-
Or just a fork — this pie is indulgent all on its own
💛 Final Thoughts
Maple Cream Pie for the Sweet Tooth is decadent, silky, and full of cozy fall flavor.
It’s the perfect dessert for anyone who loves sweets but wants something a little more special than the usual pies.
This one is comforting, creamy, and guaranteed to disappear fast.
Maple cream pie wraps up Thanksgiving with a cozy hug! Its smooth filling and flaky crust create the perfect balance of sweet and seasonal—your guests will be begging for seconds!
12. Maple Cream Pie for the Sweet Tooth
Editor’s Choice
Mora Ceramic Deep Fluted Pie Dish for Baking – 9 inch Porcelain Pie Plat…
NileHome Stainless Steel Whisk Set 8″ 10″ 12″ Kitchen Whisk Balloon Whis…
Spring Chef Dough Blender, Top Professional Pastry Cutter with Heavy Dut…
Conclusion

These 12 classic Thanksgiving pies not only capture the spirit of the holiday but also offer something for every palate.
From the traditional pumpkin to the adventurous rhubarb, each pie brings its own story and flavor to the table.
So as you plan your Thanksgiving menu, consider including a variety of these pies to delight your guests and create lasting memories around the dinner table.
Note: We aim to provide accurate product links, but some may occasionally expire or become unavailable. If this happens, please search directly on Amazon for the product or a suitable alternative.
This post contains Amazon affiliate links, meaning I may earn a small commission if you purchase through my links, at no extra cost to you.
Frequently Asked Questions
What are the most popular classic Thanksgiving pies?
When it comes to classic Thanksgiving pies, you can’t go wrong with favorites like Pumpkin Pie and Pecan Pie. These desserts are staples on many holiday tables, beloved for their comforting flavors and rich traditions.
Other crowd-pleasers include Apple Pie, Sweet Potato Pie, and Chocolate Cream Pie. Each pie brings a unique taste that caters to different preferences, ensuring there’s something for everyone!
How can I make Thanksgiving pies ahead of time?
Making Thanksgiving pies ahead of time is a fantastic way to reduce stress on the big day! You can prepare your pie crusts and fillings in advance. Just make sure to store them properly in the refrigerator or freezer.
For instance, most pies, like Pumpkin Pie or Pecan Pie, can be baked a few days in advance and stored in the fridge. Just remember to let them cool completely before covering them with plastic wrap or foil!
What are some tips for perfecting pie crust?
Perfecting your pie crust can make all the difference in your Thanksgiving pies! Start with cold ingredients—use chilled butter and ice water to keep your dough flaky.
Don’t overwork the dough; mix until just combined to avoid tough crusts. Also, chilling the dough before rolling it out can prevent shrinking during baking. A sprinkle of salt in the crust adds flavor, ensuring your dessert is a hit at the table!
How do I choose the right pie for my Thanksgiving dinner?
Choosing the right pie for your Thanksgiving dinner depends on your guests’ preferences and dietary restrictions. Classic options like Pumpkin Pie and Pecan Pie are usually safe bets.
If you want to mix things up, consider offering a variety like Coconut Cream Pie or Blueberry Pie to cater to diverse tastes. Don’t forget to ask guests if they have any favorites or allergies to ensure everyone enjoys dessert!
Can I use alternative ingredients for Thanksgiving pies?
Absolutely! You can easily adapt classic Thanksgiving pies using alternative ingredients. For instance, if you’re looking for a gluten-free option, you can utilize almond flour or a gluten-free pie crust mix.
For dairy-free pies, consider using coconut milk or almond milk in place of cream and butter. These substitutions can keep the spirit of traditional pies while accommodating various dietary needs, ensuring every guest can indulge!
Related Topics
Thanksgiving pie
classic desserts
holiday baking
pumpkin pie
pecan pie
easy recipes
seasonal treats
family favorites
dessert ideas
festive sweets
traditional pies
autumn flavors


Leave a Reply