
Clutter in a small kid’s room drives me to share simple, real ways to save space. I created this post because I want parents to feel calm at home, not overwhelmed by toys and clothes that spill onto the floor. With a few smart tricks, any room can feel bigger and easier to use.
If you’re a parent, caregiver, or anyone decorating a kid’s space in a small home, this one is for you. You care about safety, style, and a room that actually works for your child. These ideas fit busy mornings and weekend projects alike.
Here you’ll get 21 space-saving storage hacks for kids’ rooms that are practical, budget-friendly, and easy to try this weekend. Some ideas use simple boxes and bins, while others make the most of wall and door space. And yes, number 9 might surprise you.
You’ll find tricks from under-bed storage to vertical shelves. Closet organizers, labeled bins, and multi-use furniture help tame toys, books, clothes, and art. Each idea shows you how to keep items within reach and out of the way at the same time.
This guide includes a quick plan you can follow to measure what you have, decide what to keep, and place each item where it makes the most sense. You’ll get practical examples and sensory details that make the ideas feel doable. The tone stays realistic, not flashy, so you can trust what you try.
Not every hack fits every room, and that’s okay. Start with one or two ideas, test them, and tweak. The goal is a space that stays neat without turning into extra work for you or your child. If you try one hack this week, you’ll notice the floor again and the morning routine start to feel smoother.
Contents
- 1. Under-Bed Bins: The Secret Weapon
- 2. Vertical Space: Shelves & Hooks
- 3. Multi-Functional Furniture
- 4. Toy Rotation System
- 5. DIY Bookshelf Ladders
- 6. Closet Organizers
- 7. Pegboards for Creativity
- 8. Hidden Storage Inside Furniture
- 9. The Magic of Magnetic Strips
- 10. Art Supply Caddy
- 11. Wall-Mounted Storage Baskets
- 12. Customizable Drawer Dividers
- 13. Fun Toy Chests
- 14. DIY Folding Play Table
- 15. Clothing Rolls Instead of Folding
- 16. Clear Storage Bags for Seasonal Clothes
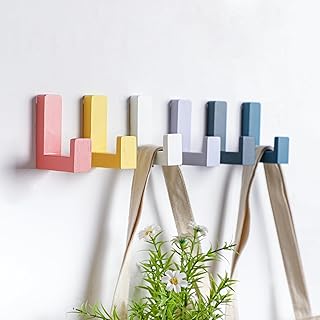
- 17. DIY Coat Hooks with Flair
- 18. Playroom Zones
- 19. Collapsible Storage Boxes
- 20. Creative Display Boards
- 21. Fun Storage Labels
1. Under-Bed Bins: The Secret Weapon

Running out of space in your kid’s room? Under-bed storage bins can fix that.
These bins use the space most kids ignore.
Choose clear plastic bins so you see what’s inside without opening every box, or pick fabric bins to match the room’s style.
Labeling turns setup into a quick DIY project your child can help with.
Place heavier items toward the back of the bin and lighter ones near the front for easy access.
Tip: choose bins with wheels for easy sliding.
Think seasonally: swap in sweaters and boots for winter, then swap back in summer gear as the weather changes.
Keep a small photo or color code to help kids learn where things go.
Set a simple rule: every item has a home.
This keeps toys, clothes, and bedding tidy without a full closet overhaul.
Measure your bed height before buying to pick the right bin size.
Short, shallow bins work best if you can slide them from the side.
Keep a weekly 10-minute check to swap toys and clothes as needed.
Label with colors: blue for bedding, red for toys, green for clothes.
Avoid overloading a single bin; distribute items across a few bins.
Under-bed bins are the secret weapon in conquering clutter! With a little creativity and some labels, you can turn wasted space into a stylish storage solution that makes every room shine.
1. Under-Bed Bins: The Secret Weapon
Editor’s Choice

Sterilite 56 Qt Wheeled Latching Storage Box, Stackable Bin with Latch L…

Set of 2 Black 40 Gallon Industrial Tote Plastic Bins with Wheels – Conv…

NIIMBOT B1 Label Maker Machine with Tape, Thermal Label Printer Easy to …
2. Vertical Space: Shelves & Hooks

Your floor space is tight. You need more storage without crowding the room.
Go vertical. Wall shelves and hooks give you space you can reach fast.
– Floating shelves save space and look sharp. They hold books, small toys, or artwork. Pick finishes that match the room and avoid sharp edges.
– Install shelves at kid-friendly heights so kids tidy up or grab a story. Use a low shelf to create a storytime corner by stacking a few books and a soft mat.
Hooks near the door save space. Choose bright colors to fit the theme. Group several hooks for a quick grab-and-go zone.
Storytime corner setup: add a soft rug, a small lamp, and shelves within reach to invite reading. Let your child pick decor to make it theirs.
Tips to stay tidy: put a bin on a shelf for tiny pieces. Label by color or character to make cleanup easy. Rotate items every few weeks so favorites get a turn on display.
Safety and setup: anchor shelves to studs, avoid overloading, and check for wobble.
Involve your kid: let them choose colors and decor for the shelves. Their choices make the space theirs and easier to maintain.
Start small, then build over time for a cleaner room.
2. Vertical Space: Shelves & Hooks
Editor’s Choice

BAYKA Floating Shelves for Wall, Wall Mounted Rustic Wood Shelves for Ba…
6 Pack Cute Kids Coat Wall Hooks Wooden Adhesive Decorative Colorful Wal…

Humble Crew Toy Storage Bins for Kids, Set of 4, Primary Colors, Small -…
3. Multi-Functional Furniture

Kids’ rooms are small and busy. You need space-saving storage solutions that work every day. Multi-functional furniture saves space and reduces clutter.
– Bed with built-in drawers A bed with drawers under it saves floor space. You can hide blankets, toys, or extra sheets inside.
– Storage ottomans An ottoman that opens stores toys or art supplies inside. It also doubles as a comfy seat during stories.
– Desk with shelves or cubbies A desk with shelves keeps school stuff within reach. A lift-top top gives extra working space when you need it.
– Storage bench or window seat A bench with a hidden bin provides seating and stash space. It’s perfect for blankets or plush toys.
– Wall shelves and hooks Floating shelves hold books and boxes off the floor. Hooks keep backpacks and coats easy to grab.
Choose two or three pieces that fit your room and your child’s needs. Measure the space first, so you don’t buy the wrong size. Pick safe options with rounded edges and sturdy builds. Match colors to the room and keep a simple palette.
– Tip Let kids choose colors or patterns to make the furniture feel like theirs.
3. Multi-Functional Furniture
Editor’s Choice

Allewie Queen Size Platform Bed Frame with 3 Storage Drawers, Faux Leath…

DUMOS 30in Foldable Storage Ottoman Bench, Storage Chest, End of Bed Foo…

CubiCubi Computer Corner Desk with Storage Shelves, 47 Inch Reversible L…
4. Toy Rotation System

If your child’s room feels crowded with toys, a simple rotation can change the space fast. You keep a small set out, and put the rest in storage. Use clear bins so you both can see what’s inside. A quick swap every few weeks keeps the fun alive and the mess down.
– Choose the set: Pick 8–12 toys or a couple of themed bins to stay out. Less is more for easy cleanup.
– Store smart: Use transparent containers with lids. Label each bin with a bright name or color.
– Set a schedule: Decide on a swap cycle that fits your life—every 2–3 weeks works for most families.
– Involve your child: Let them help decide which toys join the display and which go away. This builds ownership and reduces whining.
– Make swapping fun: Create a mini “toy swap” day or a quick show-and-tell to announce the new set.
– Keep it simple: After a swap, tidy the remaining toys. A quick 5-minute sweep helps.
The benefits are clear: less clutter, easier cleaning, and toys that feel fresh again. If a child resists, start small—rotate just one shelf or a single category first.
4. Toy Rotation System
Editor’s Choice

YIHONG 6 Pack Clear Pantry Organizer Bins, Plastic Containers with Handl…

Nelko Label Maker Machine with Tape, P21 Bluetooth Label Printer, Wirele…

Spinning Stacking Toys – Rainbow Tower, Kids Stackable Spinning Toy, Edu…
5. DIY Bookshelf Ladders

Is your kid’s room overflowing with books but short on space? A DIY bookshelf ladder can fix that. It adds storage high up, leaves floor space clear, and makes reading easy since the books sit at eye level. Plus, it looks playful and modern.
What you’ll need
– Wood boards for the shelves and two side rails
– Sturdy brackets or metal supports
– Screws, wall anchors, and wood glue
– Sandpaper, paint or wood sealant
– A drill, saw, and a level
– Optional: colorful bookends and paintable finish to match the room
Plan your design first. Decide how tall the ladder should be and how far apart the shelves go. Different shelf heights give a fun, whimsical look and fit a mix of picture books and chapter books. Mark where you’ll mount the ladder so it’s sturdy and safe.
Step-by-step build
1) Cut two side rails and several shelves at varied heights. Keep edges smooth with sandpaper.
2) Sand and paint or seal all pieces. Let dry completely.
3) Attach shelves to the side rails with brackets, creating a ladder shape.
4) Mount the ladder on the wall or let it lean in a corner. Use screws into studs for stability.
5) Add bookends and labels to keep things tidy and easy to reach.
Kid-friendly ideas
Let your child pick colors and decorate the rails. Use bright bookends at the base for a pop of color. Keep heavier books toward the bottom to prevent tipping.
Common questions
– Will it wobble? Secure it to the wall or studs to stay steady.
– Can it fit a small room? Yes—make the footprint narrow and tall.
– What about weight? Use solid wood or thick plywood for safety.
This ladder turns clutter into a neat show of books and imagination.
5. DIY Bookshelf Ladders
Editor’s Choice

Multifunction Unfinished Wood, Signs, Wall Arts, Storage Shelves, 16.5″ …

Nuogo 40 Pack Heavy Duty Shelf Brackets Bulk Metal Floating Shelving Sup…

5 Set Metal Book Ends for Shelves Rainbow Book Shelf Dividers Library Sh…
6. Closet Organizers

Is your kid’s closet a jumble that wastes minutes each morning? A well-planned system frees up space and makes dressing easier. Use vertical space first. Install hanging organizers for shoes or small toys to keep the floor clear. A tiered shelf helps separate different types of clothing—tops above, bottoms below, seasonal pieces where they can reach them. Keep your closet calm with clear containers for accessories and labeled bins for blocks, small figures, or hair ties.
– Tip: Involve your child in choosing colors and labeling jars so they take pride in the space.
– Insight: Choose bright bins that match the room’s decor for a fun look while staying organized.
If space is tight, add a door organizer or slim shelf over the rod. Use uniform containers so everything stacks neatly. Rotate seasonal items, and let kids help with the swap to learn responsibility. Choose sturdy materials: canvas, clear plastic, or wire shelves that clean easily. With these tweaks, you’ll see the whole closet become a quick-find station rather than a mess.
6. Closet Organizers
Editor’s Choice

BOOMIBOO Hanging Closet Organize and Shelves,5-Hanging Shelf with 2 Side…

Copco 3-Tier Non-Skid Spice Rack Organizer for Kitchen Cabinet or Pantry…

Sterilite 4-Pack Ultra Latching Box, Storage Bins with Lids, Clear Plast…
7. Pegboards for Creativity

If you want neat storage that kids can use every day, pegboards are a smart choice for a small room.
They turn blank walls into active storage, showing art supplies, hats, and small toys at a glance.
A pegboard keeps clutter visible rather than buried in bins, so your child learns organization the easy way.
You can pick wooden or painted boards, add colorful hooks, and set up zones for art, dress-up, and tiny treasures.
Mount it at kid height so markers, brushes, and favorite hats are within reach without help.
Let your child decorate the board with stickers or their own art to make it feel personal.
– Craft corner Hang finished art pieces on the pegboard to create a small gallery that motivates new projects.
– Small item storage Clip small baskets on hooks for beads, buttons, dice, or tiny toys, so nothing gets lost.
– Color coding Use color groups for different items—markers and brushes in warm colors, stamps in cool tones—to speed up cleanup.
– Dress-up ready Keep lightweight costume hats and props on pegs so they’re easy to grab during play.
Pegboards are not a magic fix, but they grow with your child. They offer simple, reachable storage that boosts creativity and helps rooms stay neat.
7. Pegboards for Creativity
Editor’s Choice

Qunclay 8 Pack Pegboard Shelf Set Wooden Shelves with Metal Brackets Hoo…


Dorman Hardware 4-9845 Assorted Pegboard Wire Basket Set, Pack of 3
8. Hidden Storage Inside Furniture

Need more room in a kid’s space? Hidden storage inside furniture can free up floor space without stealing style. Look for beds with built-in drawers, ottomans with a lift-top, or coffee tables that hide a hollow area beneath the surface. These pieces stash toys, blankets, and games out of sight while keeping the room calm and clean.
Choose items that fit your decor so storage feels like part of the design. A matching finish and color helps the space stay cohesive, not crowded. Soft lighting and smooth edges make hidden spaces feel safe and inviting.
Safety matters. Check weight limits so little items don’t strain the frame. Use soft-close hinges or tracks to reduce pinched fingers. Avoid storage that blocks doors or windows, or makes top surfaces feel cluttered.
DIY option: if you’re handy, you can add hidden compartments to existing furniture. Start by picking a sturdy piece with a simple frame. Plan the size of the space you want to hide. Cut a shallow panel and attach a removable lid. Add a small latch or magnet to keep it shut. Test with light items first to confirm it stays quiet and simple to use.
Organization helps, too. Use clear bins inside the space so you can see what’s inside. Label the bins with simple words or pictures. Do a quick declutter every few weeks to keep the system working.
Hidden storage isn’t a magic fix, but it does make daily life neater and easier. It blends into the room while giving you practical space to tuck away what kids use every day.
8. Hidden Storage Inside Furniture
Editor’s Choice

SONGMICS MAZIE Collection – 43 Inches Folding Storage Ottoman Bench, Ott…

Under Bed Storage Containers with Wheels, Under Bed Shoe Storage Organiz…

OLIXIS Wood Lift Top Coffee Table with Hidden Compartment and Large Stor…
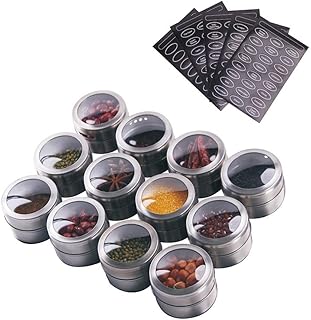
9. The Magic of Magnetic Strips

Is your kid’s room crowded with small items? Crayons, scissors, and tiny toys spill onto desks and shelves. Magnetic strips add wall storage. They keep items off desks and make things easy to see.
These strips work with many room styles. They’re quick to install and easy to move if you want to rearrange.
How to set them up
1. Choose the right strips
Pick strips that can hold the items you plan to hang.
2. Pick good spots
Mount near the desk, on the side of a bookcase, or inside a closet door.
3. Prepare the surface
Clean the area before mounting.
Use screws for heavy items.
4. Make zones
Create a strip for scissors and tools.
Add a strip for small toys.
Reserve a strip for art supplies.
5. Attach containers
Link magnetic cups or tins to hold small parts.
Label them so kids know where to return items.
6. Keep it fun
Let your child decorate the containers.
7. Safety tips
Check the weight limit of each strip.
Keep magnets away from electronics.
This setup gives you clean, accessible storage that grows with your child.
9. The Magic of Magnetic Strips
Editor’s Choice

Magnetic Knife Strips(15 Inch X Set Of 2) Magnetic Knife Storage Strip, …

Magnetic Spice Rack for Refrigerator, Kitchen Organizer and Storage Shel…
Nelko Label Maker Machine with Tape, P21 Bluetooth Label Printer, Wirele…
You might also like


10. Art Supply Caddy

Is art time spilling onto the floor? A simple art supply caddy can fix that. It keeps markers, paints, brushes, and paper in one place. You gain space on the desk and less mess to chase after. Your child learns to put things back and clean up faster, and they feel proud of a tidy station.
– Choose the right caddy: Pick a tiered plastic caddy, a wooden toolbox, or a small rolling cart that fits your space.
– Create zones inside: Separate spots for markers, paints, brushes, and paper. Each zone has its own tray.
– Color-code and label: Use color bins or tags so it’s easy to see what goes where.
– Let them decorate: Personalize the caddy with stickers or paint. It makes it theirs and keeps them eager to care for it.
– Make a craft day routine: Set a regular time to restock, tidy, and check supplies.
– Keep it within reach: Place the caddy on a low shelf or the desk edge for easy, quick art time.
– Quick maintenance: Do a weekly sweep, toss dried glue, and refill supplies.
With this setup, art time stays fun, fast, and neat. Kids grab what they need, finish quicker, and the room stays cleaner. It also reduces fights over supplies and saves you time every afternoon. That arrangement keeps art time calm, quick, and enjoyable for you and your child.
A tidy art supply caddy can turn chaos into creativity! Teach your little ones organization skills while keeping their masterpieces all in one place. After all, less mess means more inspiration!
10. Art Supply Caddy
Editor’s Choice

Storex Classroom Caddy, 9.25 x 9.25 x 5.25 Inches, Assorted Colors, Colo…

Master’s Touch Art Set – All Media Artist Supply Box – Briefcase Style U…

YASONIC 3 Tier Rolling Cart – Metal Utility Cart with Wheels, Hanging Cu…
11. Wall-Mounted Storage Baskets

Clutter grows in kids’ rooms fast. Toys, books, and gear spill into corners. Wall-mounted storage baskets offer a simple fix. They lift items off the floor and keep them within easy reach.
Placed on the wall, baskets clear the floor and create more space to play. Hang them at kid-height so your child can grab what they need without help. Mix sizes and colors to make the wall a fun part of the room.
– Tip: Choose sturdy baskets that can take daily use.
– Creative touch: Let your child decide what goes in each basket for a personal, playful vibe.
How to set them up
1) Measure the wall and mark where each basket will sit.
2) Choose two to four baskets in different sizes for varied storage.
3) Attach mounting hardware to the wall and secure to studs or use strong anchors.
4) Hang the baskets, then fill them with items. Label or color-code if you like.
5) Check the setup regularly and wipe the baskets clean.
– Safety reminder: avoid overloading any one basket. Keep the weight balanced and inspect fasteners every now and then.
11. Wall-Mounted Storage Baskets
Editor’s Choice
![Joben Oligey 3 Set [Extra Large] Hanging Wall Baskets ,Wire Basket For S...](https://m.media-amazon.com/images/I/81wfSbFkk0L._AC_UL320_.jpg)
Joben Oligey 3 Set [Extra Large] Hanging Wall Baskets ,Wire Basket For S…

KURUI 28Pcs Heavy Duty Hollow Wall Anchors for Drywall Ceiling, Toggle B…
Nelko Label Maker Machine with Tape, P21 Bluetooth Label Printer, Wirele…
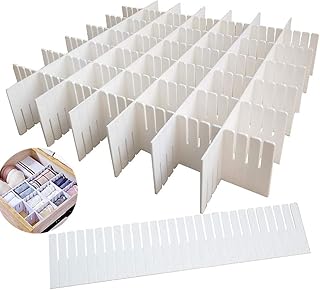
12. Customizable Drawer Dividers

Kid clutter in drawers piles up fast. Customizable drawer dividers can tame the mess. They help your child see what’s inside and grab the right item quickly. Your options range from ready-made pieces to DIY dividers you build yourself.
Pick a setup that fits the drawer and your style.
– Adjustable plastic dividers snap into place and can be moved as needs change.
\n\n
– Wood or bamboo dividers feel sturdy and last longer with everyday use.
\n\n
– DIY cardboard dividers are cheap and easy to customize with paint or stickers.
\n\n
Plan zones to separate items.
– Put clothes in one section and socks in another.
\n\n
– Make a small toy or craft-supply bin in a different slot.
\n\n
– Reserve a tiny corner for pencils, markers, and stickers.
\n\n
– Leave a space for items your child uses daily.
\n\n
Install and test.
– Measure the drawer, cut or buy dividers that fit.
\n\n
– Set up the dividers and adjust until each section feels roomy.
\n\n
– Place items in their new homes and check how easy they are to reach.
\n\n
Personalize for fun.
– Color-code sections with kid-friendly hues.
\n\n
– Add room-themed patterns or stickers for motivation.
\n\n
– Label each section using simple words or pictures.
\n\n
Maintenance tips.
– Regularly review items that still fit your child’s needs.
\n\n
– Swap sections as interests shift.
\n\n
– Wipe down plastic dividers weekly and dust wooden ones.
\n\n
– Keep a small bin for loose bits to prevent mess.
12. Customizable Drawer Dividers
Editor’s Choice
Vtopmart 12 Pack Drawer Dividers for Clothes, 4″ High 10.2″-16.6″ Adjust…

4 PCS Drawer Divider, 17″-22″ Adjustable Bamboo Drawer Dividers Organize…
OJYUDD 12PCS DIY Plastic Grid Drawer Dividers,White Adjustable Sock Unde…
13. Fun Toy Chests

Tidy storage starts with a smart toy chest. It can be decorative and useful at the same time. A good chest becomes the central storage hub for your kid’s toys and small games, keeping clutter down. This space-saving storage option helps you maintain a tidy, calm room.
– Size first: you need a chest that fits the space and your child’s toy pile.
– Safety second: pick a chest with rounded corners and a lid that slows down.
– Easy for little hands: choose a chest that’s simple to open and close.
– Inside, you can add a removable tray or fabric bins to sort items.
– Choose materials that wipe clean and last, like painted wood or durable plastic.
– Style counts: pick colors or themes your child loves.
– Labeling helps a lot: picture labels show where things go for younger kids.
– Engagement idea: make a fun cleanup song to turn putting away toys into play.
– Multi-use benefit: the lid can double as a small seat or a low table when needed.
– Put heavier toys low and lighter ones high to prevent tipping and keep balance.
– Maintain it: wipe down weekly and check hinges for wear.
With these choices, you get a practical, kid-friendly storage hub.
13. Fun Toy Chests
Editor’s Choice

HOOBRO Toy Box, Retro Wooden Look Storage Chest with Safety Hinge, Entry…

Amazon Basics Collapsible Fabric Storage Cube Bins Organizer with Handle…

Avery Durable Labels for Kids’ Gear, 3/4″ x 1-3/4″, Assorted Border Colo…
14. DIY Folding Play Table

Need more floor space in a cramped kids’ room? A DIY folding play table gives your child a tidy, ready-to-use craft zone that tucks away when the fun ends. It keeps games and art in one spot and frees up floor space for play.
Choose light materials so kids can help set it up. A thin plywood or sturdy plastic surface with folding legs is easiest. Use a simple hinge or a ready-made foldable leg set. Sand edges smooth and pick kid-safe, washable paint for color.
– Step 1 Size a compact surface about 24×30 inches so it fits in tight spaces.
– Step 2 Attach folding legs with a simple hinge or purchase ready-made foldable legs.
– Step 3 Add a side strip or small hooks to hang scissors, brushes, and rulers.
– Step 4 Finish with non-toxic paint.
– Step 5 Let your kids choose the color.
When you store the table, fold the legs and tuck it into a closet, under a bed, or behind a door.
This simple hack keeps craft benches ready, reduces clutter, and grows with your kids’ needs.
This setup scales with your space and your kids’ changing needs.
If you want extra storage, add a narrow strip with magnetic tins or a cork board on the side.
14. DIY Folding Play Table
Editor’s Choice

Tandefio 2 Pcs Folding Table Legs 28 Inch Banquet Foldable Table Legs Co…

Crayola Washable Kids Paint (6ct), Essential Preschool Supplies, Paint S…
12 Powerful Magnetic Spice Tins- Stainless Steel Spice Storage Container…
15. Clothing Rolls Instead of Folding

If your drawers overflow with kids’ clothes, rolling them can free up space and simplify mornings. This method keeps stacks neat and adds a splash of color you both will love.
– Save space with rolls: Rolling creates tight bundles that fit more into every drawer, stay neat as you open and close, and cut bulk.
– Roll the right items: T-shirts, leggings, socks, underwear, and light jackets roll easily and stay tidy.
– How to roll: Lay the item flat, smooth wrinkles, fold sleeves if needed, then roll from the bottom up with firm pressure to keep a tight cylinder.
– Show the rolls with bins: Use colorful bins or labeled dividers so each roll has a home, the drawer looks organized, and outfits are quick to grab.
– Set up a rolling station: Keep a small tray near the dresser with a roll sheet and a simple label system, plus a marker for quick updates.
– Keep a few bulky items separate: Jeans and hoodies can be folded or rolled into larger bundles when space allows, then pressed flat to reduce puff.
– Make it a fun routine: Turn roll time into a short game or race to engage kids, build a habit, and let them choose outfits confidently.
– Tips for habits: Do a quick weekly roll check to keep drawers balanced, remind kids how to pick outfits, and prevent a mess before it starts.
With practice, your kid’s room feels calmer and choosing clothes becomes a breeze.
Rolling clothes can save you up to 50% more space in drawers! Make mornings easier and keep your kids’ room colorful with this simple space-saving storage hack.
15. Clothing Rolls Instead of Folding
Editor’s Choice

8 Pack Colorful Storage Bins with Lids Stackable Storage Container for O…

Lifewit 5 Pack Drawer Dividers 4″ High, 11-17″ Adjustable Dresser Drawer…

Buzowruil Metal Rolling Clothing Rack Adjustable Freestanding Garment Or…
16. Clear Storage Bags for Seasonal Clothes

If you want a tidy kids’ room, this simple trick helps. Clear storage bags make it easy to see what’s inside without opening every bag. They stay clean and stack neatly, too.
– Choose sturdy, clear bags that you can reuse; look for bags with strong seams, wide openings, and reinforced corners to protect bulky fabrics.
– Label each bag by season or size with a durable tag.
– Try vacuum-seal bags for extra space, but don’t squeeze delicate fabrics; use them mainly for bulky items like coats and sweaters, and give wool a little air every few months, too.
– Store in handy spots on a high shelf or under the bed; use clear bins or a labeled tote so you can grab the right bag during a wardrobe switch, even on busy mornings.
– Make it a kid-friendly project by letting your child sort and seal; assign ages or grades to help them practice counting, decision making, and responsibility, building good habits.
– Keep it fun with bags that have bright colors or patterns; this visual cue makes unpacking and repacking feel like a game rather than chores for the whole family.
– Keep a simple list near the closet door to track contents; update it every season so you know what’s inside without opening bags.
With time, this system becomes second nature. It saves space and teaches kids to care for their stuff.
16. Clear Storage Bags for Seasonal Clothes
Editor’s Choice
Clear Moving Bags Heavy Duty Extra Large, Moving Supplies with Reinforce…

20 Pack Vacuum Storage Bags, Space Saver Bags (4 Jumbo/4 Large/4 Medium/…

Pajean Waterproof Plastic Tags with Marker Pens and Sticker Labels, Self…
You Might Also Like


17. DIY Coat Hooks with Flair

You want a simple way to cut clutter in your kid’s room. Coats, backpacks, and hats end up on the floor. A set of DIY coat hooks can fix that. And you can make it look fun.
What you’ll need:
– Reclaimed wood or a sturdy plank
– Hooks
– Sandpaper and safe paints or markers
– Wall screws and anchors
– A drill or screwdriver
Steps to build:
1. Pick a board that fits your wall and your child’s reach. A 2-foot plank works well.
2. Sand the edges so little fingers don’t get cut.
3. Let your kid pick colors or designs with paint, stickers, or stencils.
4. Attach hooks evenly along the board. Space them so jackets don’t crowd.
5. Mount the board high enough for you and still reachable for your child. Use anchors if you need extra hold.
Quick design ideas:
– Plan a space theme with planet-shaped hooks.
– Use your kid’s favorite color.
– Add small decals around the border for fun.
Tips and safety:
– Check weight limits and avoid very heavy bags on the hooks.
– Smooth rough spots and seal with a clear coat to last.
– Choose kid-safe finishes and proper screws.
Why it works:
Kids take ownership. They’ll hang up gear and keep their space tidy. It’s a small project with a big payoff.
17. DIY Coat Hooks with Flair
Editor’s Choice

Rockin’ Wood Real Wood Nail Up Application Rustic Reclaimed Naturally We…

Ambipolar 5-Pack Bird Flying Style Coat Hooks, Vintage Black Hooks for C…

The Mega Deals Kids Painting Set, Washable Paint for Kids with Paint Cup…
18. Playroom Zones

Is your playroom a jumble of toys that sneaks around the floor? Zones help you gain control without shouting. Start by dividing the room into three clear spaces: a reading nook, a crafting corner, and a building station. Use a bright rug, a comfy chair, or a small couch to mark each zone. Colors act like signs and make it easy for kids to know where things belong.
Next, give each zone its own storage. Low shelves, labeled bins, and baskets keep pencils, blocks, and picture books within reach. Put a simple rule: everything in a zone stays in that zone unless you move it yourself. This keeps clutter from spreading.
Involve your child. Ask what goes where and why. Let them help pick colors or decorations. It makes the plan feel personal and more likely to work. Add a quick “zone challenge” every week. See if you can clean up a zone in five minutes, or try a new theme for a day.
Tips to sharpen the setup
– Label bins with pictures.
– Keep often-used items near the entrance of each zone.
– Use vertical storage to save floor space.
With clear zones, cleanup is faster, play feels calmer, and your kid learns where to find and return toys.
18. Playroom Zones
Editor’s Choice

Sterilite 6-Pack Industrial Tote, Plastic Storage Container Bins with Li…

OLIXIS 3 Tier Storage Shelves, Metal Wire Rack Shelving Unit, Adjustable…

Lahome Modern Abstract Washable 5×7 Area Rugs for Living Room, Colorful …
19. Collapsible Storage Boxes

If you need more floor space in a kid’s room, collapsible storage boxes help. They stay out of the way when you don’t need them. When not in use, fold them flat. They slip under beds, behind doors, or on shelves. When your child needs a place to store toys, crafts, or clothes, you pop them open and fill.
Choose boxes with bright patterns or characters to make tidy storage feel fun. Visual cues help kids know where things belong. Keep a color code: blue for toys, pink for dress-up, green for crafts.
– Practical setup: Put 3-4 boxes on a lower shelf within reach.
– Sturdy choice: Choose boxes with reinforced sides and a clear label.
– Maintenance trick: Have your child fold and put away boxes after play.
DIY idea: Let kids decorate the lids with stickers, paint, or markers. This builds ownership and keeps spaces cheerful.
Common questions come up. Do they hold a lot? Yes, they store many small items, but don’t overload a box. How do you decide when to use them? Use them for items that move in and out often.
Limitations exist. They aren’t a fix for heavy garments or tiny parts. Pair them with baskets for a complete system.
Keep a quick tidy routine to stay neat. That keeps the space ready for play.
19. Collapsible Storage Boxes
Editor’s Choice

Amazon Basics Collapsible Fabric Storage Cubes Organizer with Handles, S…

6″ x 4″ Large Moving Labels for Boxes, Packing Supplies for Moving Color…

Fashion Angels 1000+ Ridiculously Cute Stickers for Kids – Fun Craft Sti…
20. Creative Display Boards

You want a kid’s room that stays neat while still showing off their art. Creative display boards make this happen. Use corkboards, magnetic boards, or simple frames to build a bright gallery wall.
They cut clutter and build pride. When a piece is on display, your child sees their effort. Refresh the display often so the wall stays lively.
– Let your child choose what goes on display. They own the art and it stays meaningful.
– Rotate pieces regularly to keep the wall fresh.
– Mix board types for different kinds of art and photos.
– Set the display at your child’s eye level for easy access.
– Add labels with the date or event to turn art into a keepsake.
– Plan an at‑home art show day to celebrate progress.
A simple setup helps you start fast. Use a single wall or hallway to create a mini gallery. Keep supplies handy: cork tiles, a magnetic strip, a few frames, and a string with clips.
This approach lowers mess and raises pride. Your child sees their creations in a real place. It motivates more art—and more care for the space they share with you.
If you have blank wall space, this system is quick to set up. It grows with your child.
Creative display boards not only declutter your child’s space but also celebrate their creativity! Let them choose and rotate their artwork – it’s their gallery, and every piece tells a story.
20. Creative Display Boards
Editor’s Choice
Cork Board Tiles – 4 Packs Adhesive Corkboards for Wall, Small Cork Boar…

2 Pack Magnet Board,Black Magnetic Board,Metal Magnetic Bulletin Board,M…

LUCKYLIFE Picture Frames Collage Wall Decor 10-Pack, Gallery Wall Frame …
21. Fun Storage Labels

If you’re tired of chasing after toys and clutter, try fun storage labels. Clear labels help kids see where things belong and cut mess quickly. Use bold colors, simple words, and friendly pictures so little ones understand at a glance.
Materials and setup—Choose bins, drawers, and shelves you want to label. Pick a color scheme that matches the room. Gather markers, printable labels, scissors, and tape or a small laminator if you have one. Picture labels work great for younger kids; words work well for older kids.
DIY labels that stick—Create labels with your child. Draw icons, color borders, or print simple words. Laminate or cover with clear tape so they last through playtime. Attach labels with removable tape or Velcro for easy updates.
Three simple label ideas—
– Color-coded bins: blue for blocks, yellow for art supplies.
– Picture labels: a chair icon for seating areas, a star for crafts.
– Word labels: “Puzzles,” “Dress-Up,” “Books.”
Make it a fun routine—Turn labeling into a mini project. Schedule a short “team organization” day. Let your kid place the labels, then test if everything matches the new spot.
Keep it practical—Limit the number of labeled spots to avoid clutter. Review and refresh labels every few months as toys change.
21. Fun Storage Labels
Editor’s Choice
Nelko Label Maker Machine with Tape, P21 Bluetooth Label Printer, Wirele…
Sterilite 4-Pack Ultra Latching Box, Storage Bins with Lids, Clear Plast…

Amazon Basics 9 inch Thermal Laminator Machine for Documents and Photos,…
Conclusion

With these 21 space-saving storage hacks, you can transform your child’s room into a tidy oasis that sparks joy and creativity.
Whether it’s utilizing under-bed storage or creating personalized display boards, each idea adds a unique touch while keeping things organized. Which one are you excited to try first? Share your own hacks and let’s keep the creativity flowing!
Note: We aim to provide accurate product links, but some may occasionally expire or become unavailable. If this happens, please search directly on Amazon for the product or a suitable alternative.
This post contains Amazon affiliate links, meaning I may earn a small commission if you purchase through my links, at no extra cost to you.
Frequently Asked Questions
What Are Some Effective Space-Saving Storage Solutions for Kids’ Rooms?
If you’re looking to declutter your child’s room, consider options like under-bed storage bins or floating shelves. These solutions utilize often-ignored spaces and keep items organized and accessible.
Multi-functional furniture, like beds with built-in drawers, can also save space while serving multiple purposes, making it easier for kids to keep their rooms tidy.
How Can I Make a DIY Bookshelf Ladder for My Kid’s Room?
Creating a DIY bookshelf ladder is a fun project that adds vertical storage to your child’s room! You’ll need some wood, a saw, and screws. Cut the wood to size, assemble the ladder, and secure it to the wall for safety.
This not only frees up floor space but also makes books easily accessible for young readers. Plus, it adds a creative touch to the décor!
What Is a Toy Rotation System and How Does It Work?
A toy rotation system is a clever way to manage toys in a kid’s room. Basically, you keep a small selection of toys out while storing the rest in clear bins. This method reduces clutter and keeps playtime fresh and exciting!
By rotating the toys regularly, your child will rediscover old favorites and maintain interest without feeling overwhelmed by too many options.
What Are Some Fun Ways to Label Storage in a Kids’ Room?
Using fun storage labels can make organizing a kid’s room more enjoyable! Opt for colorful labels with simple words and friendly pictures that help children identify where things belong. You can use stickers or printed labels on bins and shelves.
This not only teaches kids responsibility but also encourages them to keep their space tidy while making it visually appealing!
How Can I Maximize Closet Space in My Child’s Room?
To maximize closet space in your child’s room, consider using vertical organizers and hanging shelves. These can help utilize every inch of space and keep clothing and accessories neat.
Additionally, try using clear storage bags for seasonal clothes, allowing you to see what’s inside without digging. This will make dressing easier and keep the closet looking organized!
Related Topics
space-saving storage
kids room
DIY storage
small space solutions
clutter reduction
multi-functional furniture
creative organization
under-bed storage
easy hacks
seasonal storage
home organization
budget friendly


Leave a Reply