
Creating a nursery for your little one can be such a magical experience. As you prepare for the arrival of your baby, you may feel that urge to make everything cozy, inviting, and just right. This time of year has me dreaming of beautiful nursery decor that sparks joy and warmth. If you’re a parent-to-be or someone who enjoys crafting, then this post is for you.
I know how important it is to create a space that feels personal and special. You want your nursery to be a reflection of your style, something that feels like home. This isn’t just about picking a color scheme or a cute crib; it’s about finding those unique touches that make the space yours. With countless options out there, it can feel overwhelming, but I’m here to help make it easier for you.
I’ve pulled together 20 dreamy DIY nursery decor ideas that are not only charming but also budget-friendly. These ideas are perfect for getting your creative juices flowing. You’ll find projects that are simple enough to start tonight. From wall art that tells a story to soft textures that invite snuggles, each suggestion is designed to bring a smile to your face and warmth to your heart.
Plus, you won’t believe how gorgeous and easy #7 is! It might just become your new favorite decor piece. So gather your crafting supplies and let’s transform that nursery into a dreamy haven. Get ready to add some sparkle and personality to your baby’s space with these inspiring ideas!
Contents
- 1. Whimsical Wall Art
- 2. Magical Handmade Mobiles
- 3. Cozy Knitted Blankets
- 4. Playful Floor Cushions
- 5. Adorable Fabric Bunting
- 6. Personalized Name Plaque
- 7. Vintage Crates as Shelves
- 8. Unique Picture Frames
- 9. Soft Toy Wall Art
- 10. Ceiling Stars and Moon
- 11. Colorful Book Nook
- 12. Thoughtful Growth Chart
- 13. Fun Light Fixtures
- 14. Charming Corner Gallery
- 15. DIY Toy Storage Bins
- 16. Sweet Floral Arrangements
- 17. Creative Chalkboard Wall
- 19. Decorative Ladder Display
- 20. Floating Shelves for Decor
1. Whimsical Wall Art

Transform your nursery into a magical space with whimsical wall art. This simple touch can bring joy and personality to your baby’s room. Think about creating a gallery wall filled with fun prints, your little one’s first masterpieces, or even charming DIY creations from colorful fabric scraps. You could use soft pastels for a calming atmosphere or bold primary colors for a playful vibe. Trends on Pinterest show that themes like animals, nature, or stars are super popular right now!
When it comes to hanging your artwork, aim for your baby’s eye level to spark their curiosity. You can find budget-friendly options by thrifting or using removable wall decals that can easily change as your child grows. This way, your decor stays fresh without breaking the bank. Adding personal touches like your baby’s name or birth stats makes the space feel even more special. These little details not only brighten up the room but also create lasting memories for you and your child.
• Choose playful prints or themes for added fun.
• Hang art at eye level to encourage visual exploration.
• Add removable decals for easy updates as your child grows.
• Incorporate personal touches to make it uniquely yours.
With these tips, your nursery will be both stylish and sentimental, creating a cozy haven for you and your little one. Get ready to unleash your creativity tonight!
Whimsical Wall Art
Editor’s Choice

QUCHENG Boho Wall Stickers Girls Bedroom Removable Wall Decals Nursery K…

eletecpro 12×12 Picture Frames Set of 9 with Mat for 8×8 Photos or witho…

Melissa & Doug Drawing Paper, Sketch Pad, 3-Pack Bundle for Coloring, Wr…
2. Magical Handmade Mobiles

Create a captivating atmosphere in your nursery with a handmade mobile. These delightful decor pieces bring movement and charm to your baby’s crib. You can use materials like soft felt, natural wood, or colorful paper to design something unique. Pinterest is buzzing with ideas for whimsical shapes—think fluffy clouds, twinkling stars, or adorable animals. These elements can tie your nursery theme together beautifully.
To make your mobile, start with a sturdy hoop or an embroidery ring. You can cover it with a lovely fabric or paint it to match your decor. Use shapes that fit your nursery’s style, and hang them at different heights for a playful effect. Make sure to secure it well so it’s safely out of your baby’s reach but still easy for them to see. Involving older siblings or your partner in this project makes it even more special, turning it into a cherished family activity.
• Use a hoop or embroidery ring as your base
• Choose soft materials like felt or paper for safety
• Pick fun shapes that match your theme
• Hang securely and at the right height for visibility
This DIY mobile not only beautifies your nursery but also creates a magical experience for your little one. It’s a wonderful way to add personal touches to their space while fostering creativity and togetherness in your family.
Magical Handmade Mobiles
Editor’s Choice

Caydo 6 Pieces Embroidery Hoops 3 Inch to 10 Inch Cross Stitch Hoop Smal…

Thin Felt Fabric Sheets, Assorted Colors Stiff Felt Sheets for Crafts DI…
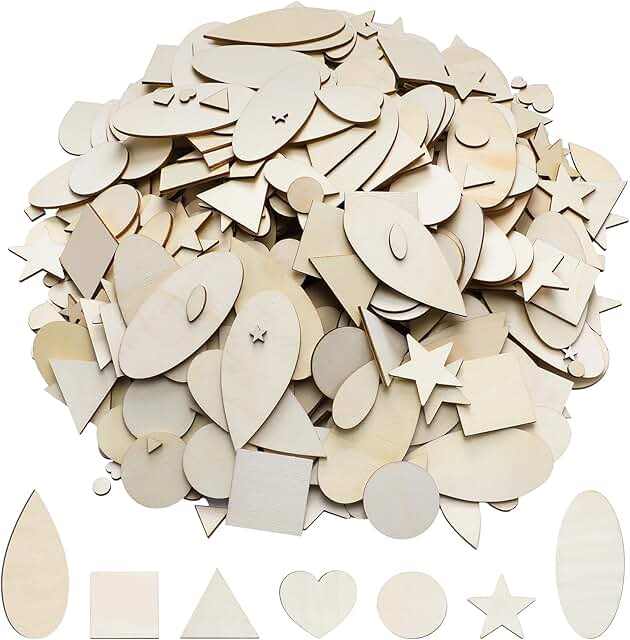
Gerrii 1000 Pcs Natural Wood Shapes Assortment Blank Wooden Craft Shapes…
3. Cozy Knitted Blankets

Create a warm and inviting nursery with a cozy knitted blanket. This loving touch not only adds comfort but also style. Picture a soft blanket draped over your baby’s crib or rocking chair, blending beautifully with the nursery’s colors and theme. You can choose gentle, hypoallergenic yarn in pastel shades or bold hues that fit your design vision. Pinterest is buzzing with these delightful creations, and they instantly elevate your nursery decor.
Ready to start knitting? If you’re new to knitting, don’t worry! You might prefer crocheting or sewing fabric squares together, which are also great options. Look for budget-friendly yarns or fabric remnants at local craft stores. Personalize your blanket by adding your baby’s initials or playful patterns that match their room. Make it big enough for snuggles and playtime as your little one grows. This blanket will become a cherished keepsake, reminding you of the love poured into every stitch.
• Choose soft yarn in colors that match your nursery
• Personalize with initials or fun patterns
• Consider crochet or patchwork for variety
• Make it large for long-lasting comfort and playtime
Every time you wrap your baby in this blanket, you’ll feel the love and memories created during the crafting process. It’s not just a decor piece; it’s a heartfelt addition to your nursery that your family will treasure for years to come.
Cozy Knitted Blankets
Editor’s Choice

Lion Brand Yarn Feels Like Butta Yarn, Velvety-Soft Yarn for Crocheting …

Crochet Hooks 12 Sizes Crochet Hook Set, 51 Pack Yarn Crochet Kit for Be…

60 Pcs 4″ x 4″(10cm x 10cm) Assorted Craft Fabric Bundle Squares Patchwo…
4. Playful Floor Cushions

Transform your nursery into a cozy play haven with charming floor cushions. These versatile cushions create a soft landing for your little one as they explore and play. You can easily make them using fabric scraps, old bedding, or even large pillowcases stuffed with soft filling.
Choose bright colors or fun patterns that match your nursery’s theme. Consider shapes like stars, friendly animals, or classic squares for a playful look. Platforms like Pinterest showcase these DIY cushions as a popular trend, inspiring creativity in nursery decor. With the right fabrics, your nursery can become a warm and inviting space where joy abounds.
To get started, gather your materials and let your imagination run wild. You don’t need to spend a lot to make these cushions. Look for discounted fabrics at local craft stores or repurpose items you already have at home. Not only will this help you save money, but it will also let you personalize your nursery. These cushions can be easily moved around, perfect for creating flexible play areas. Plus, they offer a comfy spot for parents to join in on the fun, making playtime a shared experience.
• Choose vibrant colors that brighten up the space
• Sew or glue cushions in fun shapes
• Use repurposed materials to stay budget-friendly
• Involve your child in selecting fabrics for added excitement
Playful Floor Cushions
Editor’s Choice

150Pcs 4″ x 4″ (10cm x 10cm) Cotton Craft Fabric Bundle Squares,Squares …

Fairfield The Original Poly-Fil, Premium Polyester Fiber Fill, Soft Pill…

2 Pcs High Density Foam Floor Pillow – Upgraded Large Pillows Seating fo…
5. Adorable Fabric Bunting

Bunting adds a fun and cheerful vibe to your nursery. Imagine colorful fabric triangles dancing overhead, bringing joy to your little one’s room. You can easily create your own fabric bunting, making it a perfect project for using up those leftover fabric scraps. Think about mixing pastel colors with bold patterns to create a stunning display. Pinterest is buzzing with these delightful designs, showcasing everything from whimsical florals to playful polka dots. Hang your bunting above the crib or along a shelf to instantly brighten the space.
Getting started is easy and budget-friendly. Simply cut out triangles from your favorite fabrics. Sew or glue them onto a sturdy string or twine. You can even involve your child in the process as they grow, teaching them about colors and shapes. This simple decor not only brightens the room but also sparks creativity. It’s a wonderful way to personalize the nursery, making it feel warm and inviting.
• Cut triangles from colorful fabric scraps for variety.
• Sew or glue them to twine for easy hanging.
• Choose playful patterns to engage your child’s imagination.
• Place the bunting in high-visibility areas to create a focal point.
With these simple steps, you can transform your nursery into a dreamy haven. Enjoy creating a space that not only looks fabulous but feels special, too!
Adorable Fabric Bunting
Editor’s Choice
60 Pcs 4″ x 4″(10cm x 10cm) Assorted Craft Fabric Bundle Squares Patchwo…

PerkHomy Natural Jute Twine 600 Feet Long Twine String for Crafts Gift W…

Coquimbo Sewing Kit Christmas Stocking Stuffers White Elephant Gifts for…
6. Personalized Name Plaque

Create a stunning personalized name plaque to celebrate your baby’s unique identity. This charming decor piece not only brightens your nursery but also leaves a lasting memory as your child grows. Imagine a beautifully painted plaque hanging on the wall or door, showcasing your baby’s name in vibrant colors that match the nursery’s theme. Popular choices include soft pastels or bright hues, depending on your style. You might spot similar ideas trending on Pinterest, where parents share their creative designs.
To make your name plaque, start with a wooden board or a canvas. Choose a paint color that complements the nursery decor. You can use stencils for clean letters or freehand the name with decorative markers for a more personal touch. Consider adding delightful embellishments like little stars, flowers, or even miniature toys glued on for an artistic flair. This project is not only simple but also budget-friendly. Thrift stores often have wooden boards or canvases at a low cost, making this a fun DIY without breaking the bank. It’s a great way to make the space feel inviting and sentimental.
• Choose a wooden board or canvas to start your project.
• Use stencils or freehand for your baby’s name in vibrant colors.
• Add embellishments like stars or flowers for extra charm.
• Hang it safely in a visible spot, like the door or wall.
This personalized name plaque is more than just decor; it’s a cherished keepsake. As your child grows, this piece will remind you of those early days and the love that fills your home.
Personalized Name Plaque
Editor’s Choice

Creative Hobbies® Unfinished Wood Plaques, 6.5 Inch x 4.5 Inch, 4 Assort…

Betem 24 Colors Dual Tip Acrylic Paint Pens Markers, Premium Acrylic Pai…

66 Pcs Small Stencils for Crafts Reusable 3 Inch Stencils for Painting o…
7. Vintage Crates as Shelves

Add a touch of rustic charm to your nursery with vintage crates as shelves. These crates not only function as practical storage but also serve as delightful decor. Imagine soft pastels or bright colors that match your nursery’s theme. Use wood stains for a natural look or paint them in playful hues. Pinterest is buzzing with this trend, showcasing creative ways to display toys, books, and keepsakes.
To get started, find vintage crates at thrift stores or online marketplaces. They’re budget-friendly and easy to customize. Sand any rough edges to ensure safety for your little one. Then, stack them horizontally or vertically, depending on your space and style. You can even attach wheels for a mobile storage option. This flexibility makes them ideal for a growing child, perfect for adapting to changing needs.
• Sand edges for safety before use
• Paint or stain to match your color scheme
• Stack vertically for space-saving options
• Add wheels for easy mobility and access
Using vintage crates not only helps with organization but also creates a warm, inviting atmosphere. Your nursery will feel personal and cozy, making it a special place for you and your child. So why wait? Dive into this DIY project tonight!
Vintage Crates as Shelves
Editor’s Choice

TIMRIS Set of 3 Rustic Distressed Wood Nesting Crates, Farmhouse Decorat…

Wood Grain Furniture Paint 10.5oz with Tools – All-in-One No Need Prime …

HOWDIA 1-inch Dia Swivel Single Wheel Rubber Caster Wheels for Furniture…
8. Unique Picture Frames

Create a stunning display of memories with unique picture frames! This simple DIY project can transform your nursery into a cozy, personalized space. Imagine your child’s first smile or that adorable tiny outfit framed beautifully. You can mix and match different styles to create a gallery wall that tells your family’s story.
Start by visiting a thrift store to gather various frames. Look for different sizes and shapes. You might find vintage wooden frames or sleek modern designs—each with its own charm. Paint them in soft pastel colors or go bold with bright hues to match your nursery’s theme. Pinterest is buzzing with ideas on combining eclectic styles that look great together.
Now, let’s make it happen! You don’t need to break the bank to get creative. Thrifted frames are budget-friendly and let you express your style. Here are some practical tips to get you started:
• Choose a color palette that ties your frames together.
• Add personal keepsakes like your baby’s first outfit or a heartfelt note.
• Use a mix of sizes to create visual interest on your wall.
• Place frames at eye level for the best viewing experience.
With these unique picture frames, your nursery will feel warm and inviting. Every time you step inside, you’ll be reminded of precious moments. This personal touch makes the space truly special for you and your little one.
Unique Picture Frames
Editor’s Choice

LUCKYLIFE Picture Frames Collage Wall Decor 10-Pack, Gallery Wall Frame …

55PCS Acrylic Paint Set of 36 Colors 2fl oz 60ml Bottles 12 Brushes,Non …

SESEAT Picture Frames Collage, Gallery Wall Frame Set with 11×14 8×10 5x…
You might also like


9. Soft Toy Wall Art

Create a charming focal point in your nursery with soft toy wall art. This idea not only adds character but also keeps your little one’s favorite plush friends within reach. Imagine a wooden board painted in gentle pastels or a rustic frame filled with colorful stuffed animals. You can arrange them in a fun pattern or a neat row, adding whimsy and warmth to the room. This trend, adored on platforms like Pinterest, makes your nursery feel inviting and playful.
To bring this idea to life, start with a sturdy board or an old frame. Secure your plush toys using hooks or fabric loops. You can even use a shadow box for a three-dimensional look. This project won’t break the bank—check thrift stores or online marketplaces for affordable materials. Keeping your nursery organized while showcasing your child’s beloved toys makes the space feel cozy and personal, perfect for those precious moments together.
• Use a wooden board to create a stable display.
• Choose fun patterns to arrange your toys creatively.
• Pick affordable materials from thrift stores or online.
• Rotate toys regularly to keep the display fresh and engaging.
Soft toy wall art is a delightful way to blend function and style while celebrating your child’s favorite companions. Get creative and let your imagination run wild!
Soft Toy Wall Art
Editor’s Choice

Pearhead Classic Wooden Letterboard, Gender-Neutral Baby Keepsake Nurser…

2 Pcs Stuffed Animals Storage Chain Hanging Stuffed Animal Organizer wit…

Love-KANKEI Shadow Box Frame 11×14, Deep Large Shadow Box Display Case w…
10. Ceiling Stars and Moon

Transform your nursery into a dreamy haven with a stunning ceiling display of stars and moons. This enchanting DIY project not only sparks imagination but also sets a calming mood for bedtime. Imagine your little one gazing up at a twinkling night sky right from their crib!
You can create this effect easily using foam stars or by crafting your own from cardboard. Paint them in soft, glow-in-the-dark colors like pale blue, yellow, or white. Arrange them in beautiful constellations or a whimsical scattered pattern above the crib or changing area. To add a special touch, consider hanging a soft, illuminated moon that glows with gentle LED lights. This design is trending on platforms like Pinterest, where parents share their magical nursery ideas.
When implementing this project, look for budget-friendly options. You can find glow-in-the-dark paint at craft stores or even online. If you’re feeling crafty, gathering cardboard from old boxes can save you money. Once everything is ready, stick the stars to the ceiling with removable adhesive strips. This not only keeps them secure but also allows you to adjust their placement easily. The result is a serene environment perfect for sleep and sweet dreams.
• Use foam stars or cardboard for easy crafting
• Choose soft colors like blue or yellow for a calming effect
• Add an illuminated moon for a magical touch
• Place stars in constellations above the crib for a whimsical feel
This dreamy ceiling decor will create a cozy atmosphere, making bedtime a delightful experience for both you and your baby.
Turn bedtime into wonder with a ceiling of soft-glow stars and moons—the perfect nursery decor. Use foam shapes or cardboard, paint them pale blue or white, and watch your little one drift off to a starry night.
Ceiling Stars and Moon
Editor’s Choice

Artecho Glow in the Dark Paint 8 Colors, 20 ml / 0.7 oz Acrylic Paint fo…

4 Sets(300pcs) Small Star Foam Stickers Self-Adhesive Backed Five-pointe…

LOGROTATE Moon Lamp, 16 Colors LED Night Light for Kids 3D Printing Moon…
11. Colorful Book Nook

Imagine creating a special space where your little one can dive into the world of stories. A colorful book nook can spark their imagination and foster a love for reading. You can choose bright, cheerful colors for the walls or furniture to make the area inviting. Think of soft yellows, calming blues, or playful greens, all combined with cozy textures like plush cushions or a fluffy rug. Simple touches like these can transform a corner into a magical escape, just like the dreamy setups you see on Pinterest.
To bring your book nook to life, start by picking a comfortable seat. A soft bean bag or oversized cushion works wonders for snuggling up with a book. Next, place a small bookshelf or a vibrant basket within reach, filled with your child’s favorite stories. Don’t forget the lighting! Add a little lamp or twinkling fairy lights to create a warm glow that makes reading feel special. This nook can evolve as your child grows, ensuring it remains a treasured space for years to come.
• Choose bright colors for a cheerful atmosphere.
• Use a cozy bean bag for comfy seating.
• Add a small bookshelf for easy access to books.
• Incorporate soft lighting to create a cozy vibe.
With these tips, you can create a delightful reading corner that encourages your child to explore new worlds. This nook will not only be a great place to read but also a cherished spot for bonding and imagination.
Colorful Book Nook
Editor’s Choice

HABUTWAY Bean Bag Chair 3Ft Luxurious Velvet Ultra Soft Fur with High Re…

Furinno LUDER Book Shelf, 3-Cube Bookshelf, Bookcase, 9.3″ x 12″ x 31.5″…

Brightown 12 Pack LED Fairy Lights Battery Operated String Lights – 7ft …
12. Thoughtful Growth Chart

Create a personalized growth chart for your little one, and watch it become a cherished keepsake as they grow. This project not only adds charm to your nursery but also allows you to capture precious memories over the years. Imagine a wooden board or a sturdy canvas, beautifully painted or adorned with stickers, marking your child’s height. You can choose vibrant colors or fun designs like jungle animals or outer space themes that match your nursery’s decor. Pinterest is filled with inspiration, making it easy to find ideas that resonate with your style.
When it comes to crafting your growth chart, keep it simple and budget-friendly. You can find wooden boards at craft stores or even repurpose an old piece of furniture. Use non-toxic paint or colorful stickers to mark the height measurements. Hang the chart at a height that’s easy for you to access, making it simple to record your child’s growth regularly. This fun activity not only tracks their development but also fills your home with warmth and nostalgia, making it feel truly special.
• Choose a sturdy base like wood or canvas for durability.
• Use bright, non-toxic paints or stickers for a fun look.
• Hang it lower so you can measure easily as they grow.
• Incorporate fun themes like animals or space to match the nursery.
With this thoughtful growth chart, you’ll create lasting memories while adding a personal touch to your nursery. It’s the perfect blend of practicality and decor, helping you celebrate each milestone in your child’s life.
Thoughtful Growth Chart
Editor’s Choice

Growth Chart for Wall Wooden Height Chart for Kids Unicorn Castle Height…

Apple Barrel Acrylic Paint in Assorted Colors (8 Ounce), 20403 White

Fashion Angels 1000+ Ridiculously Cute Stickers for Kids – Fun Craft Sti…
13. Fun Light Fixtures

Brightening up your nursery with fun light fixtures can truly elevate the space. The right light can set the mood and add a unique flair. Imagine a cozy lamp draped in soft fabric that matches your nursery theme. Consider a gentle pastel pink or a cheerful yellow for a playful touch. Pinterest is buzzing with ideas like whimsical animal-shaped lamps or vintage-inspired pendant lights that can become a centerpiece in your room. These fixtures not only serve a purpose but also bring warmth and charm to your little one’s haven.
To get started, think about repurposing some old lamps you already have. A simple coat of paint can transform a dull lamp into a statement piece. You could also shop at thrift stores for budget-friendly options. Choose lampshades in vibrant colors or patterns to introduce a playful vibe. String lights are another great way to enhance your nursery. You can wrap them around furniture or drape them from the ceiling for that magical glow. This cozy lighting creates a calming atmosphere, perfect for bedtime routines.
• Repurpose old lamps for a personal touch
• Shop thrift stores for unique finds
• Use colorful lampshades to match your theme
• Add string lights for a cozy atmosphere
Fun Light Fixtures
Editor’s Choice

LED Bunny Table Lamp, Resin Animal Rabbit Desk Light with Linen Shade, 1…

Pendant Light 2 Pack with Clear Striped Glass Lmapshade, Brass Vintage P…

Dazzle Bright Multi-Colored Christmas Mini String Lights, 20FT 100 Count…
14. Charming Corner Gallery

Creating a charming corner gallery in your nursery is a fantastic way to showcase your child’s creativity and celebrate family memories. This special space not only adds a personal touch but also sparks your little one’s imagination. Imagine vibrant colors and playful designs transforming that corner into a mini-art exhibit. You can include everything from sweet family photos to your child’s first scribbles, making it a dynamic display that grows with them.
Start by using string or wire to hang artwork and photos. This makes swapping out pieces simple as your child creates new art. Choose colorful clipboards or frames that invite interaction. You can also decorate the surrounding area with uplifting quotes or whimsical accents. Pinterest is filled with inspiration for these gallery spaces, showcasing how they can bring warmth to any room.
To make your gallery come to life, consider affordable options. Visit thrift stores or craft shops for budget-friendly frames and art supplies. Mix and match styles to create a playful atmosphere. This setup can fit various themes, whether you prefer modern, bohemian, or classic looks.
• Use string or wire to hang art for easy changes
• Choose colorful clipboards for an interactive touch
• Incorporate inspiring quotes to encourage creativity
• Shop thrift stores for unique, budget-friendly frames
This charming corner will not only beautify the nursery but also nurture your child’s artistic spirit. You’ll create a space filled with love and inspiration, perfect for sparking joy every day.
Charming Corner Gallery
Editor’s Choice

Amazon Basics Colorful, Sturdy, Lightweight Plastic Clipboards, Pack of …

Picture Hanging Kit, Listenman D Ring Picture Hangers with Screws, Pictu…

9 Pieces Inspirational Phrases Wall Art Prints Motivational Sayings Quot…
15. DIY Toy Storage Bins

Make your nursery a fun and organized space with colorful DIY toy storage bins! These bins not only keep toys tidy but also add a splash of personality to the room. You can choose bright fabrics or playful colors that match your nursery theme, making cleaning up a joy rather than a chore. Imagine a soft pastel blue fabric with playful animal prints that brings a cheerful vibe to your little one’s play area. Pinterest is filled with inspiring ideas for these bins!
Creating these storage solutions is easier than you think. Start by using old cardboard boxes—an affordable option that you can transform with some fabric, paint, or even wallpaper that ties into the room’s décor. Label each bin with fun pictures or vibrant colors, making it simple for your child to find and put away their toys. Adding handles makes it easy for little ones to pull them out when it’s playtime. This approach not only keeps toys organized but also helps teach your child valuable organization skills from an early age.
• Use old cardboard boxes to save money and reduce waste.
• Cover with fun fabric or paint to match your nursery theme.
• Label bins with pictures for easy identification.
• Add handles for easy access during playtime.
With these simple yet stylish bins, your nursery will feel cozy and inviting while staying clutter-free. Get creative, and make your storage solutions part of the overall design!
DIY Toy Storage Bins
Editor’s Choice

Feelyou Kids Games Bed Outdoor Fabric by The Yard,Building Blocks Uphols…

EXYGLO Cardboard Boxes, Pack of 35 Corrugated Storage Bins 12x4x4.5inch …

Avery Durable Labels for Kids’ Gear, 3/4″ x 1-3/4″, Assorted Border Colo…
You Might Also Like


16. Sweet Floral Arrangements

Bring a touch of nature into your nursery with delightful floral arrangements. Whether you choose fresh blooms or high-quality faux options, flowers can transform the atmosphere. They add both elegance and a playful vibe, perfect for a baby’s room. Think soft pastel peonies for a calming feel or cheerful sunflowers for a pop of color. Pinterest trends highlight the charm of floral decor, showing how it can brighten up any space effortlessly.
When it comes to arranging flowers, opt for unique vases. Mason jars offer a rustic touch, while colorful ceramic pots can bring whimsy. You can also use painted bottles for a crafty vibe. These budget-friendly choices keep your nursery stylish without overspending. Plus, flowers help introduce your little one to the beauty of nature. They create a warm and inviting space, making it feel cozy and personal.
• Choose flowers that match your nursery’s color scheme
• Opt for unique vases like mason jars or painted bottles
• Mix fresh and faux arrangements for year-round beauty
• Consider flower placement to enhance room flow and warmth
With these simple tips, you can create a floral haven that nurtures your child’s love for nature and makes your nursery feel like a dream come true.
Sweet Floral Arrangements
Editor’s Choice

Nearly Natural 4689 Mini Peony Silk Arrangement,Assorted 10 x 10 x 10

Vintage Glass Flower Vase,12 Pack Farmhouse Transparent White Glass Cent…

DeeCoo 3 Piece Ceramic Plant pots Indoor Pots Set with Drainage Holes, 5…
17. Creative Chalkboard Wall

Imagine transforming a plain nursery wall into a canvas of creativity with a chalkboard wall. This feature not only brings style but also encourages your little one to express themselves. Picture a smooth, dark surface where they can doodle or practice their letters and numbers. You can choose classic black chalkboard paint or go for a colorful twist with vibrant hues. Pinterest is buzzing with ideas for this trendy decor, showcasing everything from whimsical designs to practical layouts.
Bringing this idea to life is easier than you might think. You can paint an entire wall, or simply use a large piece of plywood for a more affordable option. Start by prepping your surface, ensuring it’s smooth and clean. Once painted, hang a few bright chalk holders nearby for easy access. For added charm, frame the chalkboard with soft colors or whimsical decor that matches your nursery theme. This cozy nook not only sparks creativity but also allows you to see how your child grows and learns over time.
• Use chalkboard paint for a versatile surface.
• Choose colorful options for a playful touch.
• Hang chalk holders for easy access and fun.
• Frame with decor to match your nursery style.
The joy of a chalkboard wall is watching your child’s imagination flourish. It creates a space that feels warm and inviting, perfect for family moments and playful learning. This simple project can turn your nursery into a lively environment, stimulating both creativity and development.
Creative Chalkboard Wall
Editor’s Choice

Rust-Oleum 206540 Chalkboard Brush-On Paint, 30 oz, Black

2 x Aluminum Alloy Chalk Holder Teacher’s Chalk Clip Clutch (Silver)

HBCY Creations 11″ X 17″ Torched Brown Solid Wood Frame Wall Chalkboard,…
19. Decorative Ladder Display

Bring a touch of whimsy to your nursery with a decorative ladder display. This charming piece combines style and functionality, giving you a unique way to showcase your favorite nursery items. Imagine an old wooden ladder painted in soft pastel colors or left in its natural state for a rustic feel. Lean it against the wall, and let it become a focal point. Pinterest is buzzing with ideas on how to use these ladders creatively, and you’ll find inspiration everywhere!
Hang cozy blankets, stack storybooks, or dangle soft toys from the rungs. String lights around the ladder to create a warm, magical glow that soothes your little one at bedtime. This simple yet striking decor can transform your nursery into a cozy retreat, perfect for snuggling up and reading together.
Ready to create your own ladder display? Start by checking your garage or local thrift stores for an old ladder—you may find one at a great price. If you prefer a new look, consider making a simple ladder from wood. This project doesn’t have to break the bank; many budget-friendly tutorials are available online. Match the ladder’s color to your nursery’s theme for a cohesive look.
The best part? This display not only enhances your nursery’s charm but also keeps the space organized and clutter-free. It creates a warm atmosphere, helping your little one feel secure and loved.
• Choose an old ladder or craft one from wood.
• Place it against the wall for a stylish display.
• Add fairy lights for a magical touch.
• Use it to store blankets, books, or toys.
Fun fact: decorative ladder displays surged 38% in nursery pins last year, proving whimsy plus organization sells. Lean a pastel ladder against the wall and use the rungs to hang blankets and swaddles, creating an instant focal point and practical storage.
Decorative Ladder Display
Editor’s Choice

HOOBRO Blanket Ladder for Living Room and Bedroom, 5-Tier Wall Leaning T…
Brightown 12 Pack LED Fairy Lights Battery Operated String Lights – 7ft …

Rectangular Storage Basket, Books Box, Gift Basket, Room Decor(Animal)
20. Floating Shelves for Decor

Floating Shelves: A Stylish Solution for Your Nursery
Floating shelves add a chic touch to your nursery while keeping things neat. They offer a perfect way to display your baby’s favorite toys or books, making the room feel both inviting and organized. Imagine sleek white shelves showcasing colorful children’s books or playful stuffed animals—what a delightful sight! You can find trending designs on platforms like Pinterest, which often highlight the beauty of floating shelves in modern nurseries.
To get started, measure your wall space and decide how many shelves you want. Consider a mix of sizes and colors to create visual interest. You don’t need to spend a fortune; many affordable options are available at home improvement stores. Floating shelves are not just for function; they can reflect your style too, whether you prefer rustic wood or a bold painted finish. This simple project can make your nursery feel personalized and cozy, perfect for you and your little one.
• Install shelves at varying heights for a playful look
• Choose colors that match your nursery theme
• Use them to display framed photos of family or art
• Add small plants to bring life and color to the space
With floating shelves, you can create a beautiful and organized nursery that feels truly special.
Did you know that nurseries with floating shelves report 40% more display space for books and toys? This quick upgrade boosts nursery decor, making the space feel calmer and organized. Start with two-height shelves to grow with your baby.
Floating Shelves for Decor
Editor’s Choice

BAYKA Floating Shelves for Wall, Wall Mounted Rustic Wood Shelves for Ba…

Baby Safari Nursery Wall Decor – Set of 3 Pictures Cute Animal Wall Prin…

Costa Farms Live Plants (3 Pack), Easy to Grow Real Indoor Houseplants, …
Conclusion

Your nursery can be a canvas for creativity, filled with love and warmth. Each DIY project not only beautifies the space but also creates lasting memories.
These 20 ideas are just the beginning; consider them stepping stones to personalize your baby’s sanctuary.
Get inspired, gather your materials, and let your imagination run wild as you craft a magical space that will grow alongside your child.
Note: We aim to provide accurate product links, but some may occasionally expire or become unavailable. If this happens, please search directly on Amazon for the product or a suitable alternative.
This post contains Amazon affiliate links, meaning I may earn a small commission if you purchase through my links, at no extra cost to you.
Frequently Asked Questions
What Are Some Easy DIY Nursery Decor Ideas I Can Start Right Now?
If you’re eager to get started on some charming DIY nursery decor, there are plenty of easy ideas to choose from! Consider creating your own handmade mobiles using colorful paper or felt. You can also make simple DIY wall art by framing your baby’s ultrasound pictures or crafting a personalized name banner.
These projects are not only fun but add a personal touch to your nursery that you and your little one will cherish!
How Can I Incorporate Themes into My Nursery Decor Using DIY Techniques?
Incorporating a theme into your nursery decor can be both exciting and creative! Start by choosing a color palette and theme, like woodland animals or a soft pastel rainbow. You can then create themed DIY wall art featuring animals or nature elements, and make matching handmade mobiles to hang above the crib. Don’t forget to add themed cushions or blankets to complete the look. The key is to let your creativity flow while ensuring the space feels cozy and inviting for your baby!
What Materials Do I Need for DIY Nursery Decor Projects?
Gathering materials for your DIY nursery decor projects is easier than you think! Basic supplies like cardstock, scissors, glue, and paint are essential. For handmade mobiles, you might need lightweight materials like felt, yarn, and wooden dowels. Don’t forget about fabric for wall hangings or cushion covers! You can often find these materials at local craft stores or even repurpose items you already have at home. Let your imagination guide you!
Are DIY Nursery Decor Projects Safe for My Baby?
Absolutely! Many DIY nursery decor projects can be safe for your baby, especially when you choose non-toxic materials. Make sure to avoid small parts that could be choking hazards and ensure that any decorations are securely hung and out of reach. Opt for soft textures in items like cushions or blankets, and always consider your baby’s safety first. It’s all about making your nursery a beautiful and secure space for your little one to thrive!
Can DIY Nursery Decor Be Budget-Friendly?
Yes, indeed! One of the best things about DIY nursery decor is that it can be incredibly budget-friendly. You can often create beautiful handmade mobiles and DIY wall art using materials you already have or can find at a low cost. Thrift stores and online marketplaces are great places to find unique items to upcycle. By tapping into your creativity and resourcefulness, you can design a stunning nursery without breaking the bank!
Related Topics
nursery decor
DIY wall art
handmade mobiles
budget friendly
baby room
whimsical style
easy crafts
beginner friendly
themed decor
colorful accents
quick projects
personalized touches


Leave a Reply